Tenants & the manage drawer
/ade/dashboard/tenants
A tenant is a workspace: its own projects, catalog, members, keys and policies. Go to Workspace → Tenants to see every tenant you belong to, switch between them, create a new one, and — for the ones you administer — open the manage drawer. The page needs no current workspace, so it is also where you go when you have none.
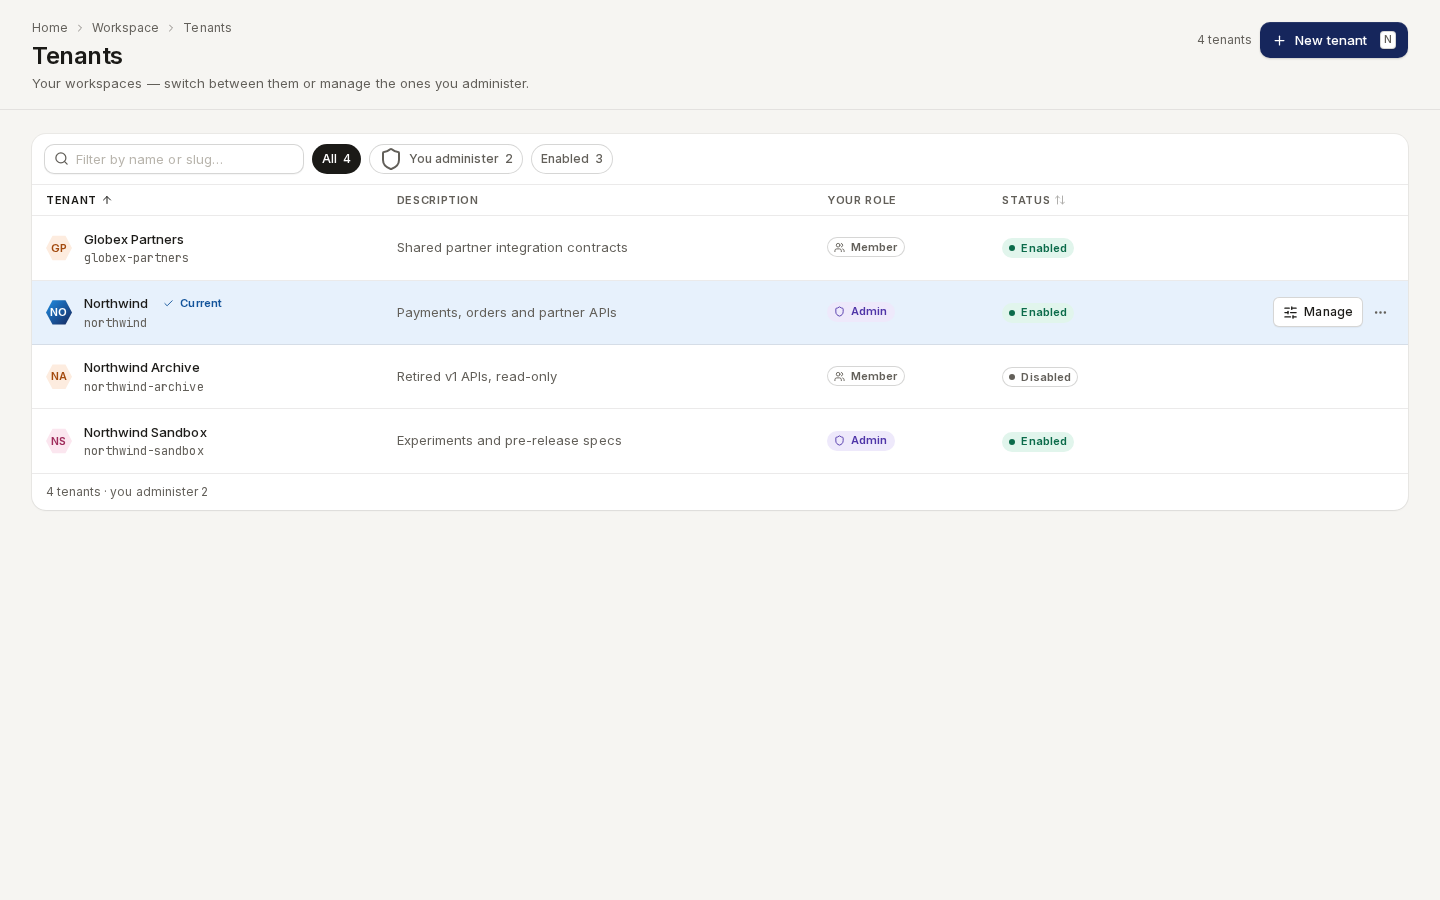
/ade/dashboard/tenantsThe tenants list
Each row shows the tenant's name and slug, its Description, Your role (Admin or Member) and Status (Enabled or Disabled). The current tenant carries a Current badge.
- Filter by name or slug… narrows the list; the chips All, You administer and Enabled carry their counts.
- Click a tenant's name to make it your current tenant (or choose Select from the row's ⋯ menu). The workspace switcher in the rail does the same from any page.
- Manage opens the drawer, and ⋯ → Edit opens Edit tenant. Both appear only for tenants you administer; for the others the menu reads Manage — admins only.
Create a tenant
- Click “New tenant” (or press N; the switcher's Create workspace opens the same dialog).
- In Create a tenant, enter the Organization name — the URL slug is suggested from it; edit it if you like (lower-case letters, numbers and dashes).
- Click “Continue”.
You become the new tenant's administrator and it becomes your current tenant.
Edit a tenant
Edit tenant (from the row menu or the drawer's header) changes the Tenant name, Tenant slug and Description. Click “Save changes”. The slug appears in published OpenAPI URLs, so changing it asks you to confirm the before → after values first.
The manage drawer
Click “Manage” on a tenant you administer. Manage tenant opens with five sections down its side; the header shows the slug, the member count and whether it is your current tenant.
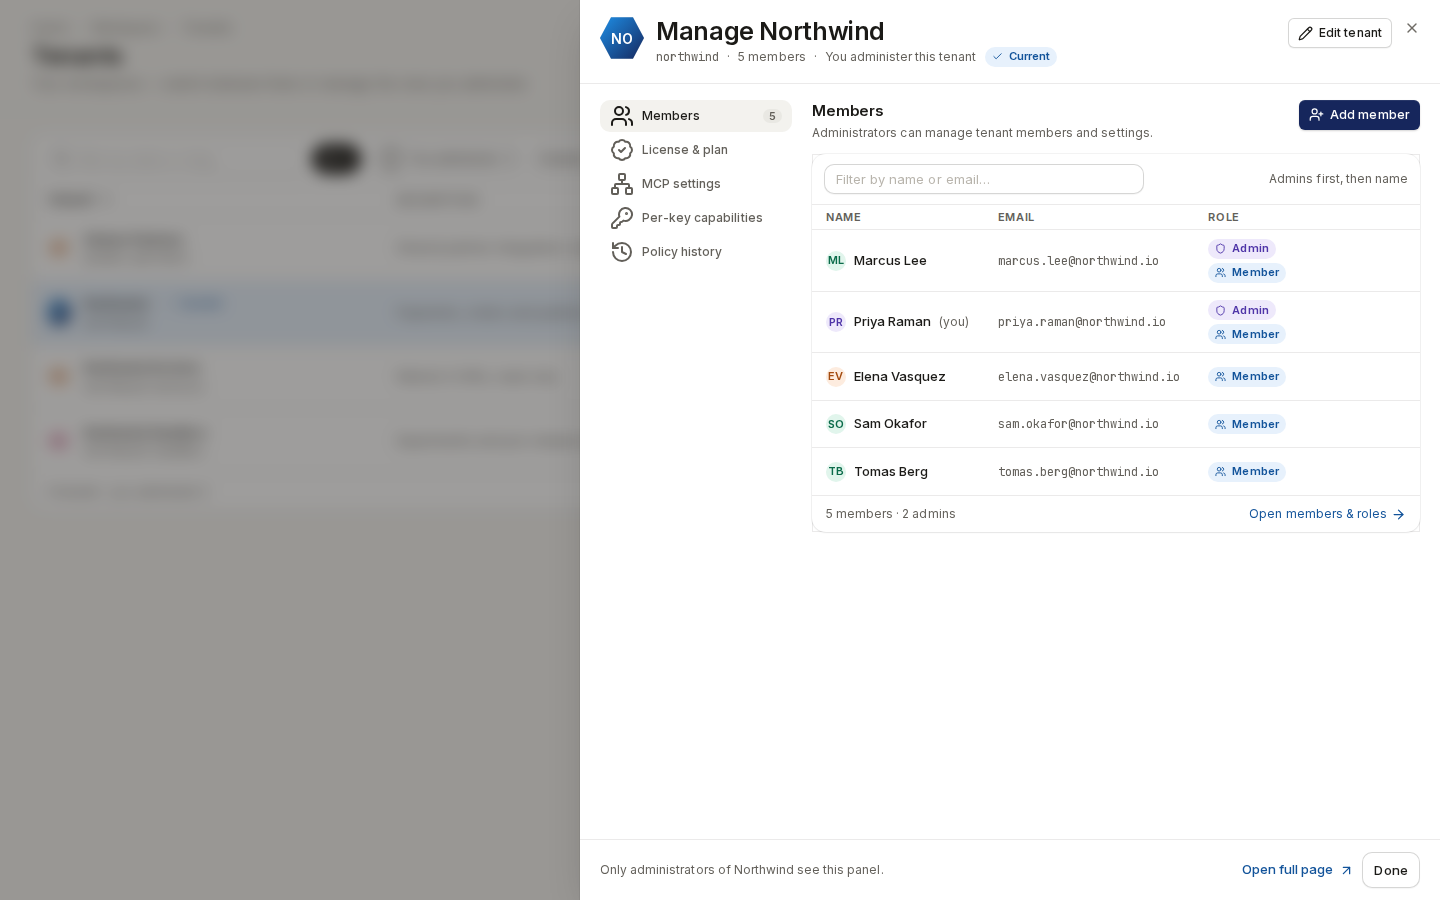
/ade/dashboard/tenantsLicense & plan, MCP settings, Per-key capabilities and Policy history read the current tenant only. For any other tenant they say Select … as your current tenant to view … — select it first. Members works for every tenant you administer. A section keeps its state while you look at another, so an unsaved MCP draft survives a glance at the history (the tab shows a dot while changes are unsaved).
Done closes the drawer; Open full page goes to Members.
Members
The tenant's people, administrators first, with Filter by name or email….
- Click “Add member”, enter the Email address, tick Administrator to grant that role too, and click “Add member”.
- Edit member roles grants or revokes the administrator role; click “Save changes”.
- Remove asks to confirm, names the tenant they lose, and warns when the person is also an administrator.
You cannot edit or remove your own row. For invitations, seats and custom roles use the Members and Roles pages.
License & plan
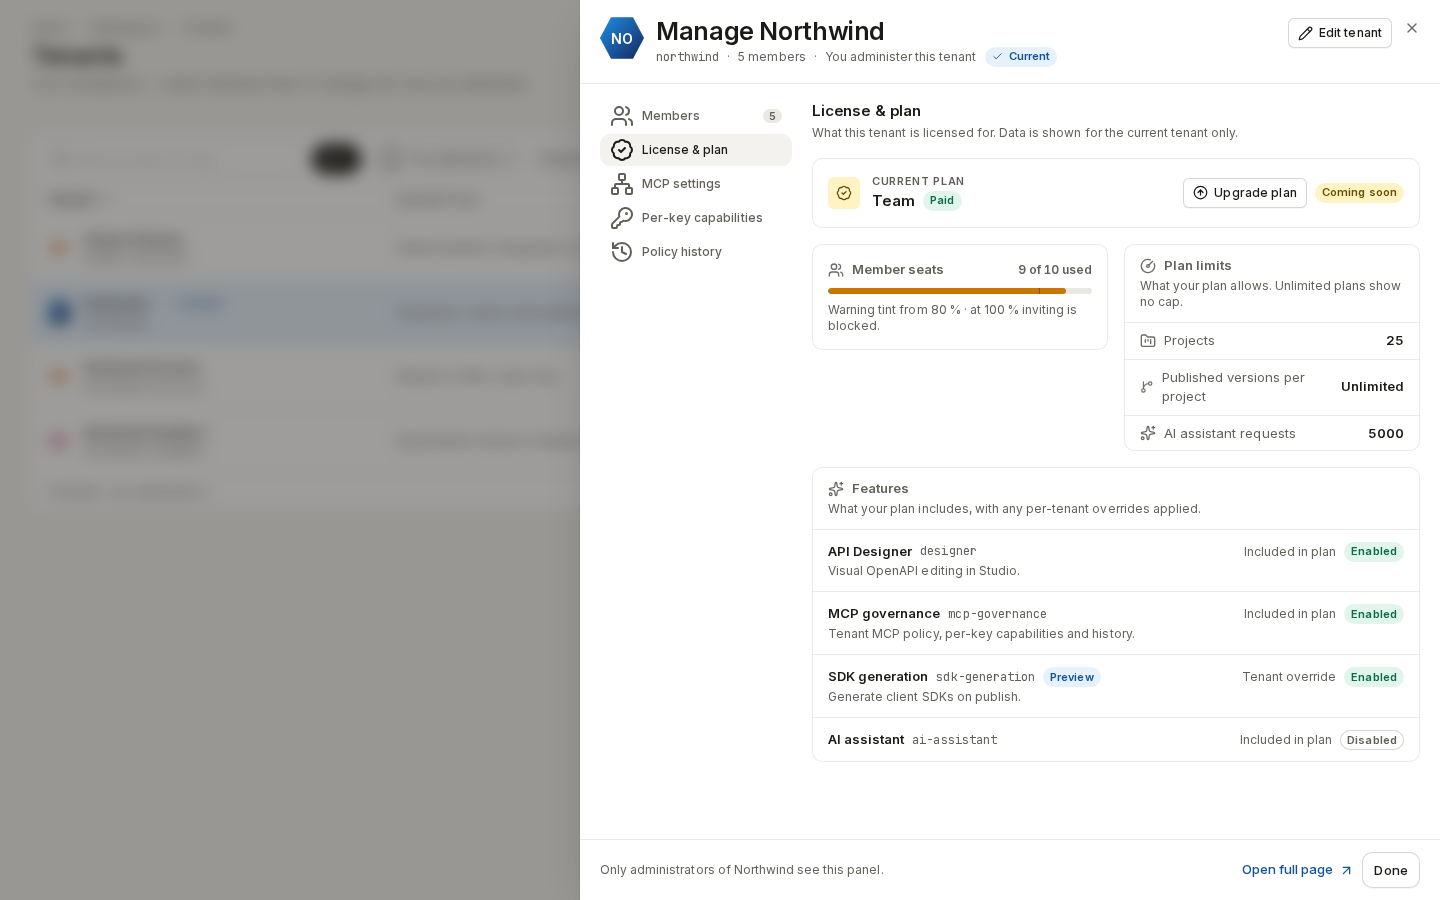
/ade/dashboard/tenants- Current plan — the plan's name and type. Upgrade plan is marked Coming soon; contact your operator to change plans today.
- Member seats — 9 of 10 used, with a meter that turns to a warning tint from 80 %. At 100 %, inviting is blocked until a seat is freed or the plan grows.
- Plan limits — Projects, Published versions per project and AI assistant requests; Unlimited means no cap.
- Features — what the plan includes, each Enabled or Disabled, marked Included in plan or Tenant override (and Preview for preview features).
Plans, licences and overrides are set by an operator in the admin console.
MCP settings
The tenant's MCP policy decides which tools agents may call. tools/list always returns the full
catalog; the ceiling, defaults and anonymous flags only gate tools/call.
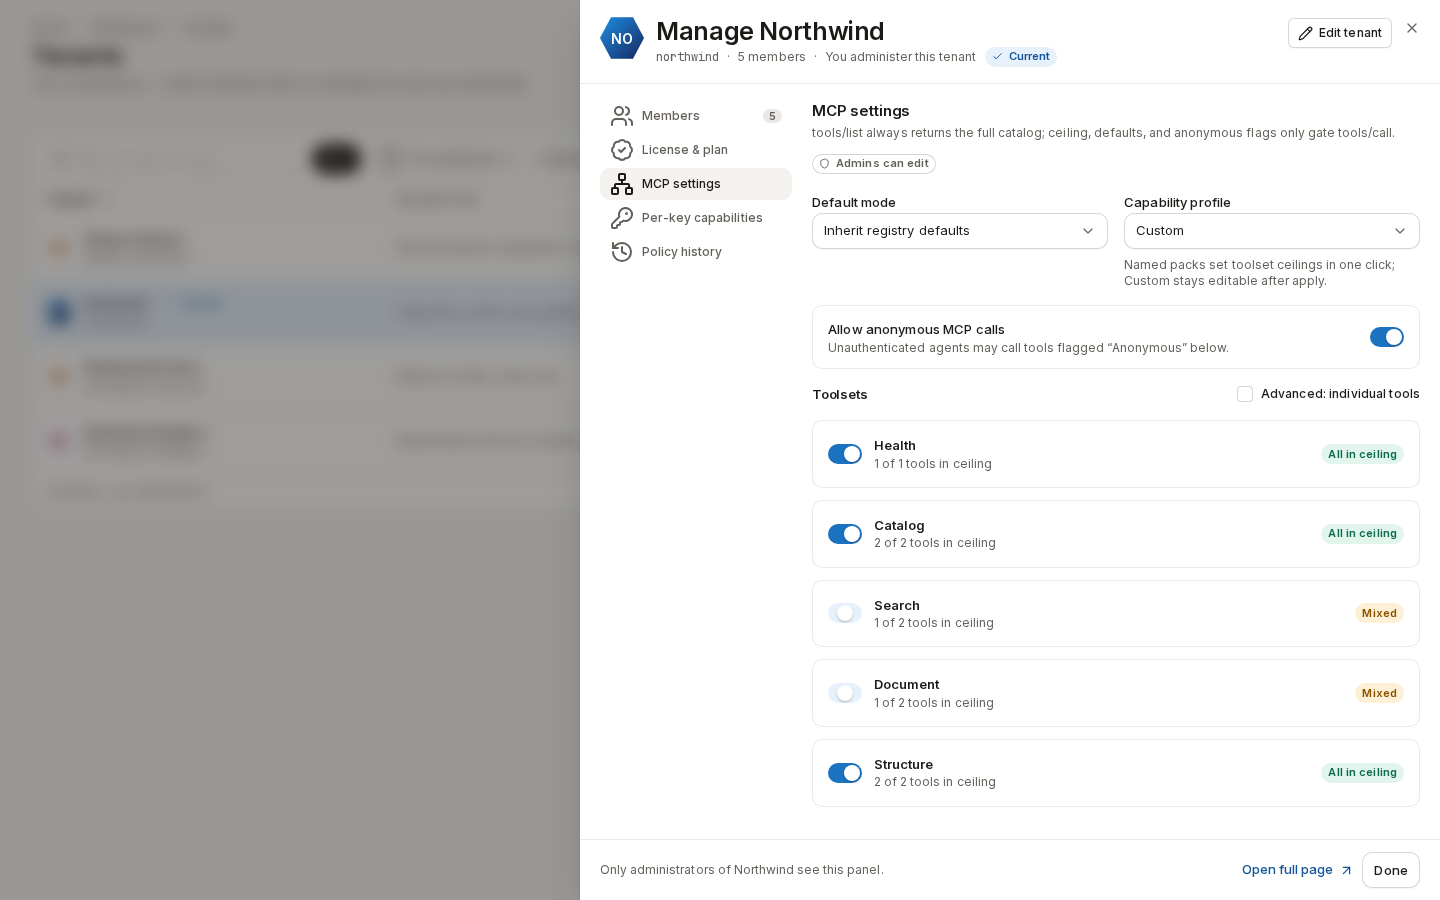
/ade/dashboard/tenants- Choose a Default mode — All registry tools, Inherit registry defaults or Explicit per-tool flags.
- Optionally pick a Capability profile — Catalog only, Search + catalog or Full read set the toolset ceilings in one click; Custom stays editable afterwards.
- Turn Allow anonymous MCP calls on or off. When on, unauthenticated agents may call the tools flagged Anonymous.
- Under Toolsets, switch whole toolsets into or out of the ceiling. A card's badge reads All in ceiling, Mixed or Off. Tick Advanced: individual tools to set In ceiling, Default and Anonymous per tool.
- Click “Save changes” in the Unsaved MCP settings changes bar (or Discard).
Disabling a toolset that active MCP keys use asks first — those agents lose access on their next call. Only tenant administrators can change MCP options; others see them read-only.
Per-key capabilities
What one MCP API key may call. Each key either Inherit tenant defaults or has a Custom enable-set, capped by the tenant ceiling.
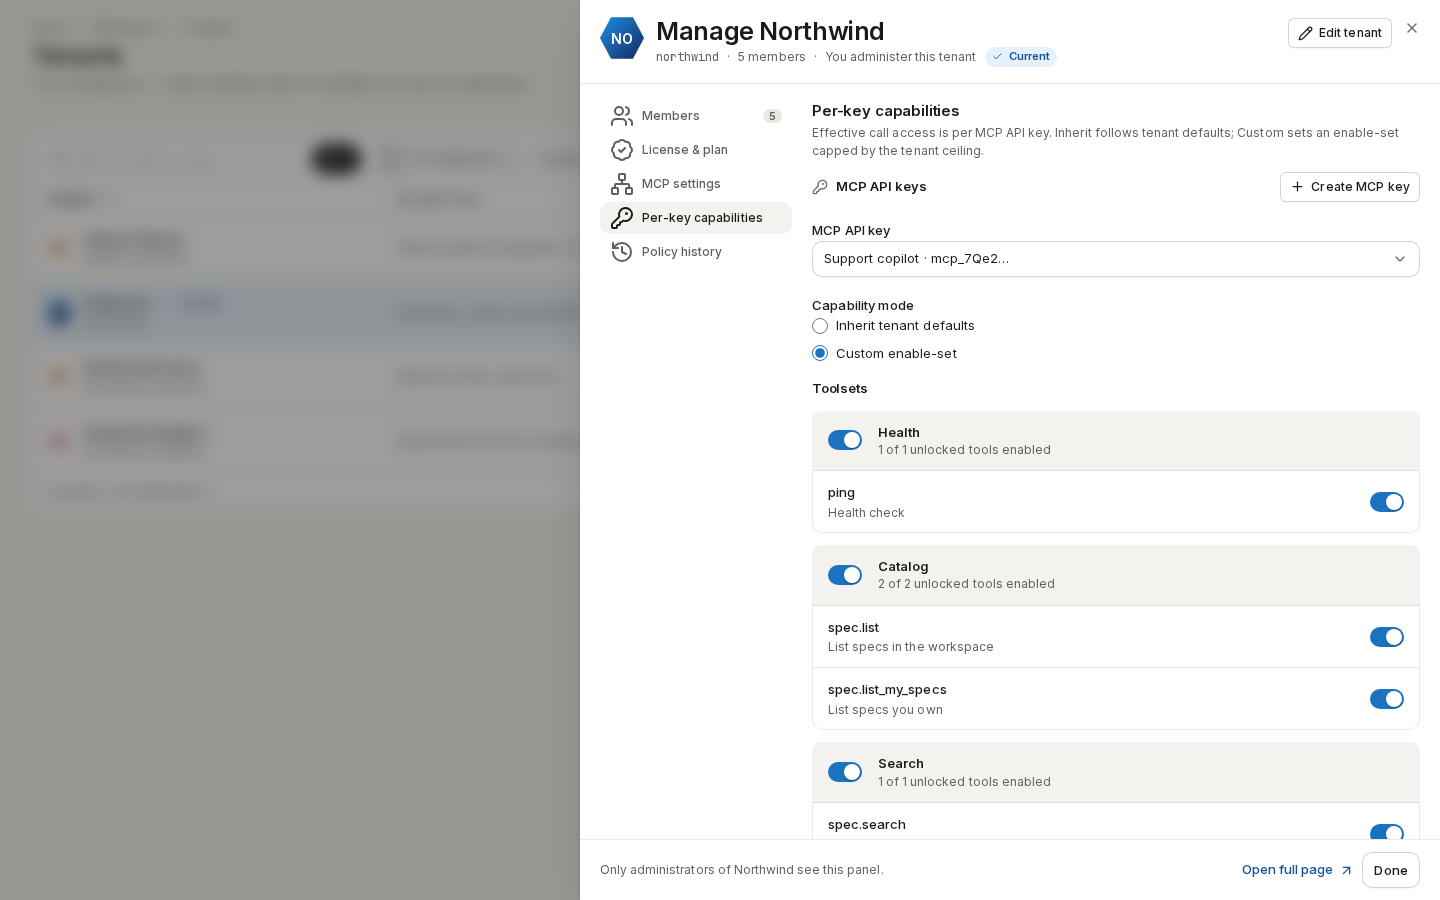
/ade/dashboard/tenants- Choose the key under MCP API key.
- Choose a Capability mode. With Custom enable-set, switch toolsets and tools on or off; a tool outside the tenant ceiling is locked.
- Check Effective summary — how many tools the key can call, and which are denied.
- Click “Save capabilities” (or Discard).
To issue a key, click “Create MCP key”, enter a Label (for example Prod agent) and create
it; MCP API key created shows the secret once — copy it and click “I've saved my key”. A new
key inherits the tenant policy. Revoked keys are listed but cannot be edited.
Policy history
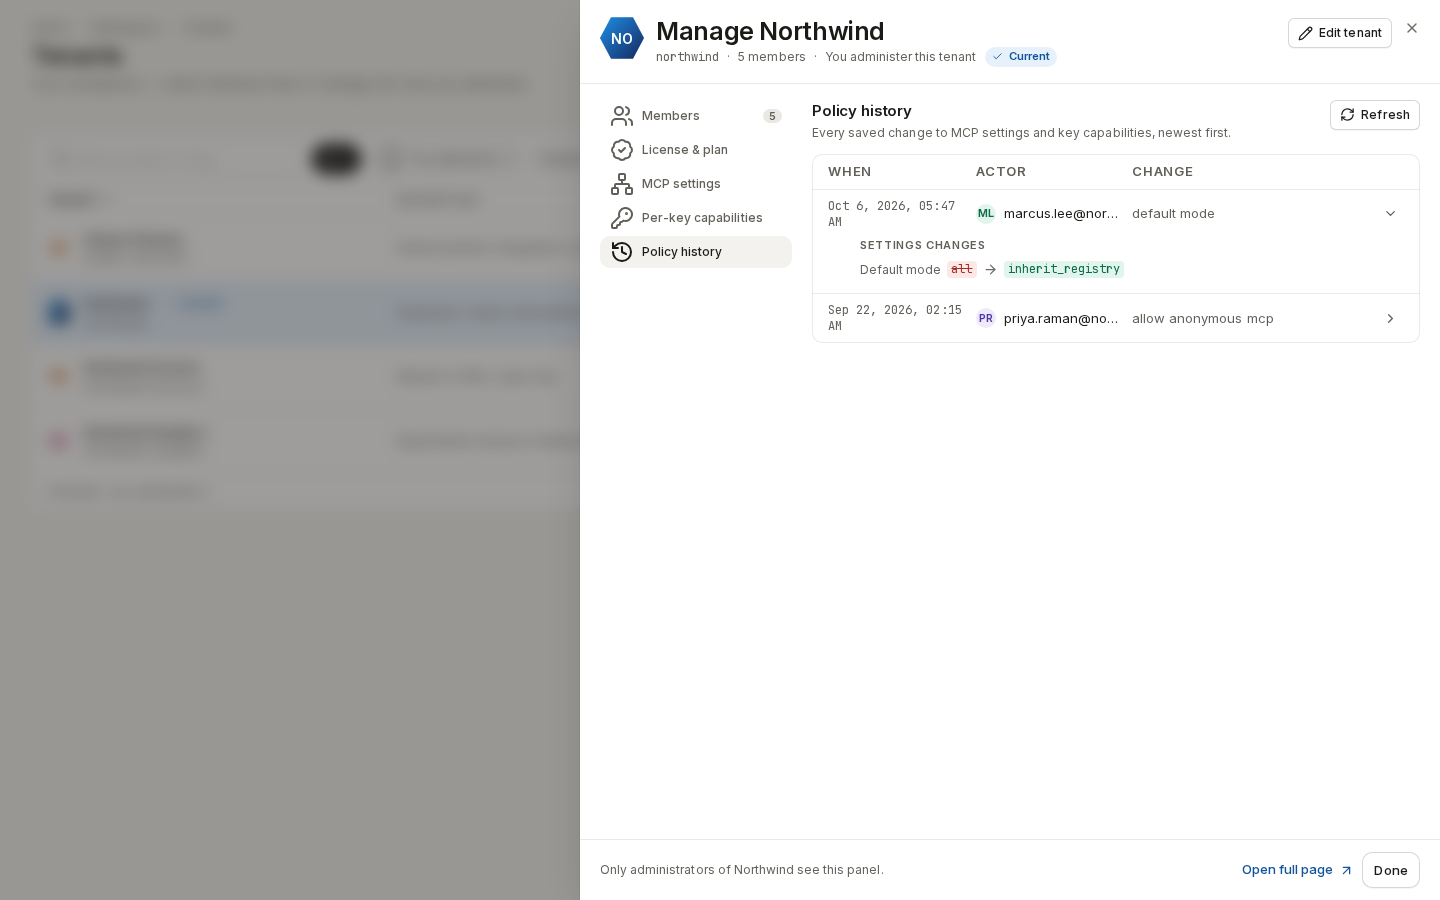
Every saved change to MCP settings and key capabilities, newest first: When, Actor and Change. Expand a row to see its Settings changes and Tool-flag changes as before → after values. Refresh reloads the list.
/ade/dashboard/tenantsWith the API and the CLI
| Section | Endpoints |
|---|---|
| License & plan | GET /v1/tenants/{tenant}/license |
| MCP settings | GET / PUT /v1/tenants/{tenant}/mcp-policy |
| Policy history | GET /v1/tenants/{tenant}/mcp-policy/history |
| Per-key capabilities | GET / POST /v1/tenants/{tenant}/mcp-keys, GET / PATCH / DELETE …/mcp-keys/{key}, PUT …/mcp-keys/{key}/capabilities, POST …/capabilities/preview |
See the API reference. apiome auth tenants lists the tenants you
can reach (GET /v1/tenants/me) — see the CLI quick-start.
Where next
- Members — invitations and seats
- Roles — what each role may do
- API keys & agent keys
- Agent access