Profile & security
/ade/dashboard/profile
Profile is your own account: the name teammates see, your password, two-factor authentication, the ways you can sign in and your current session. Open the user menu at the foot of the rail and choose Profile. The tabs under the title switch between Profile, Linked accounts and Preferences (Ctrl / ⌘+,).
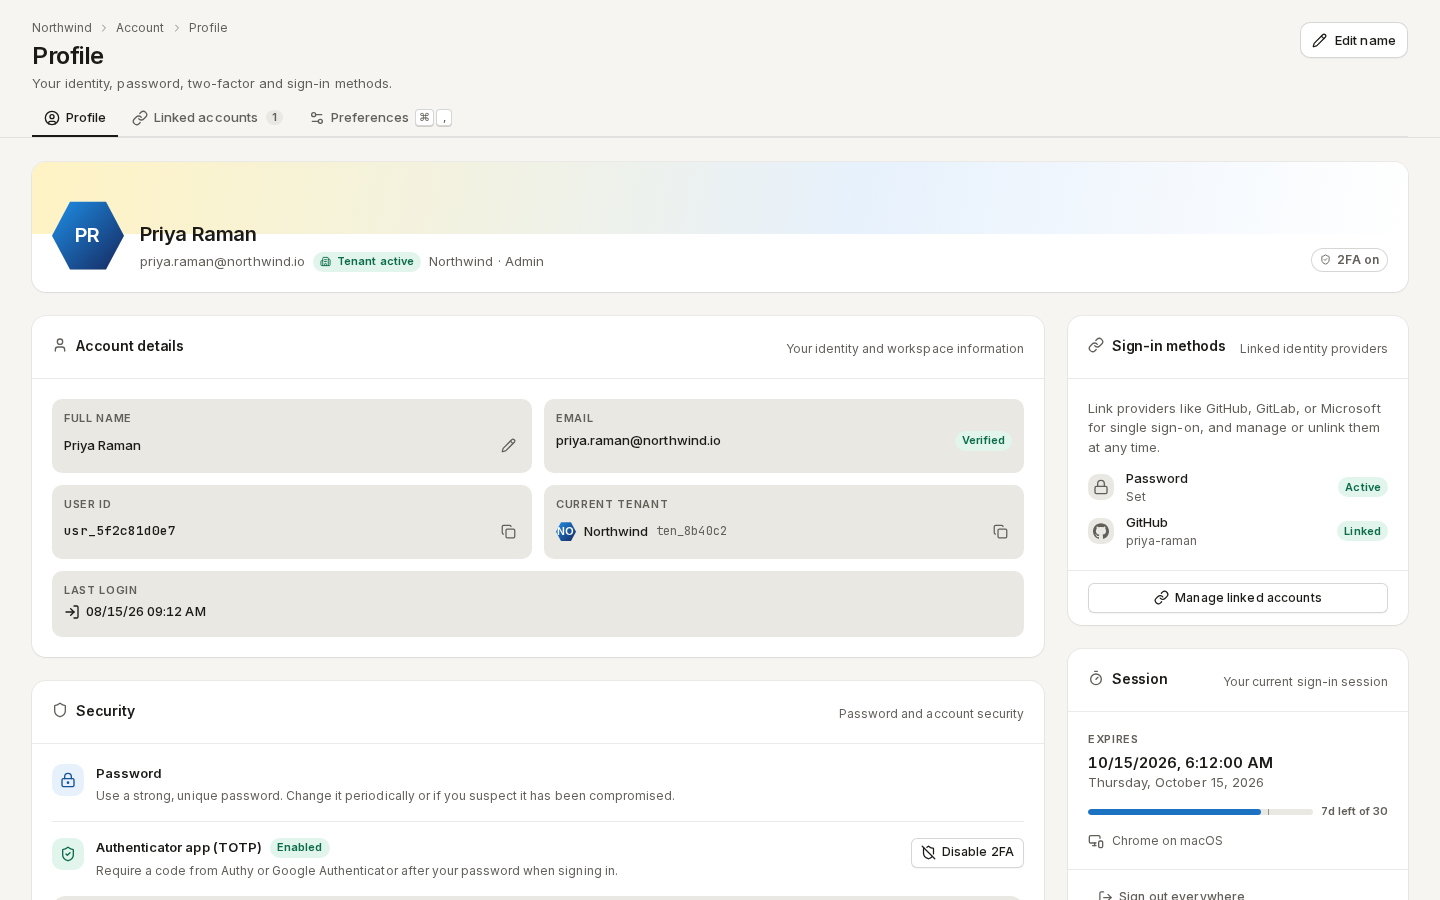
/ade/dashboard/profileEvery signed-in user has this page; nothing on it needs a role.
Your identity
The card at the top shows your name, email, the workspace you are in with your role, and 2FA on or 2FA off. Account details below it lists:
| Tile | Shows |
|---|---|
| Full name | The name shown to teammates and in activity |
| Your sign-in address, marked Verified once confirmed | |
| User ID | Your account id, with a copy button |
| Current tenant | The workspace you are working in and its id, with a copy button |
| Last login | When you last signed in |
Change your name
- Click “Edit name” at the top of the page (or the pencil on the Full name tile).
- Type your Full name.
- Click “Save”. The rail's user menu changes at once.
Your email cannot be changed here.
Change your password
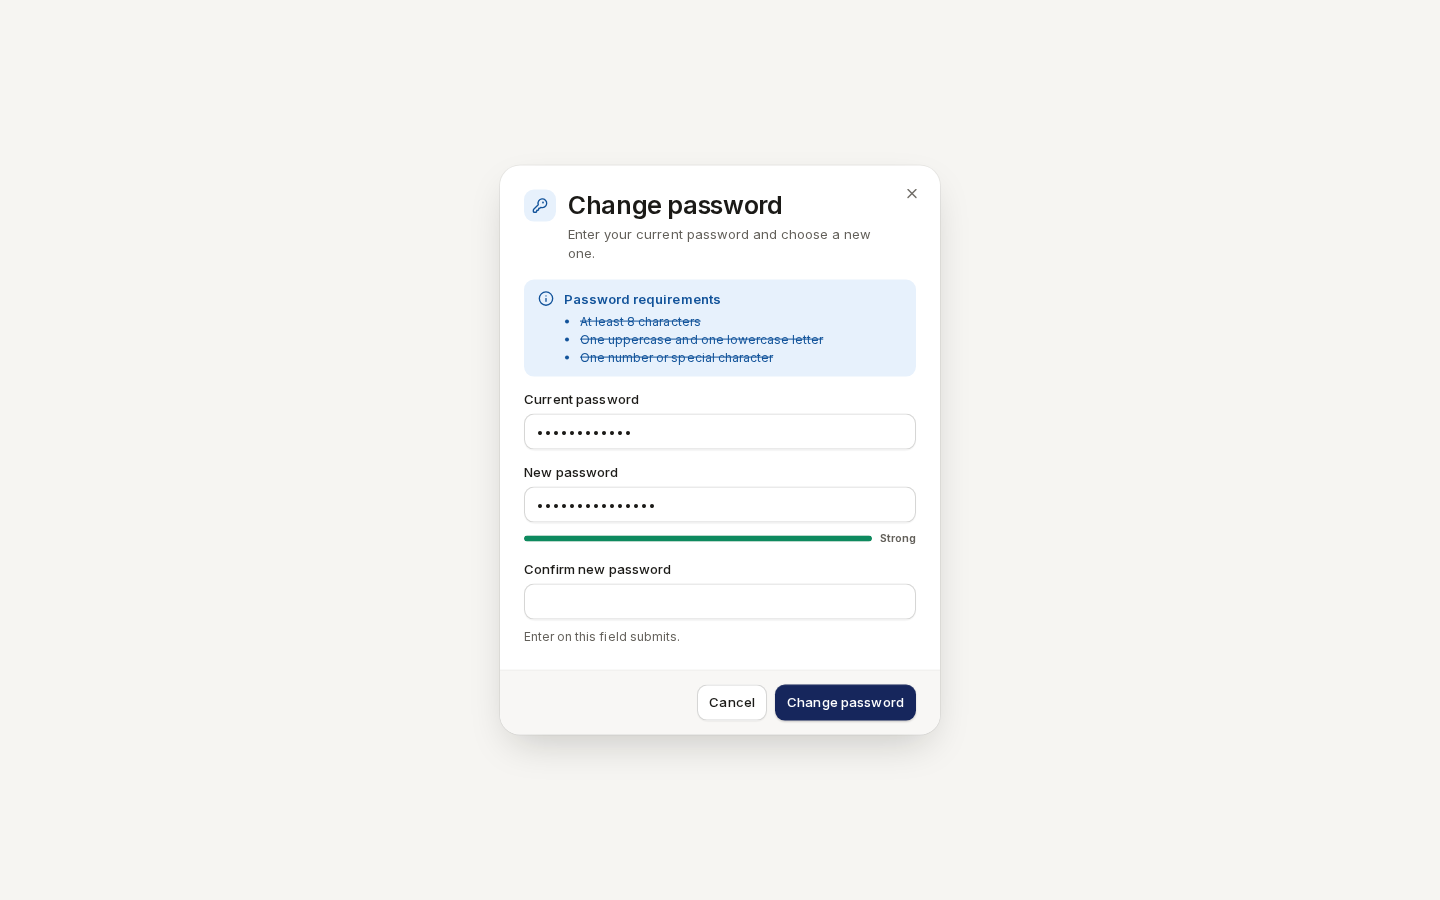
- Click “Change password” at the foot of the Security card.
- Enter your Current password.
- Enter a New password. It needs at least 8 characters, one uppercase and one lowercase letter, and one number or special character; the meter under the field reads Weak, Fair or Strong.
- Type it again in Confirm new password.
- Click “Change password”. Password changed successfully. appears above the page.
/ade/dashboard/profileIf you signed up with an identity provider and never set a password, sign in with that provider — see Linked accounts.
Two-factor authentication
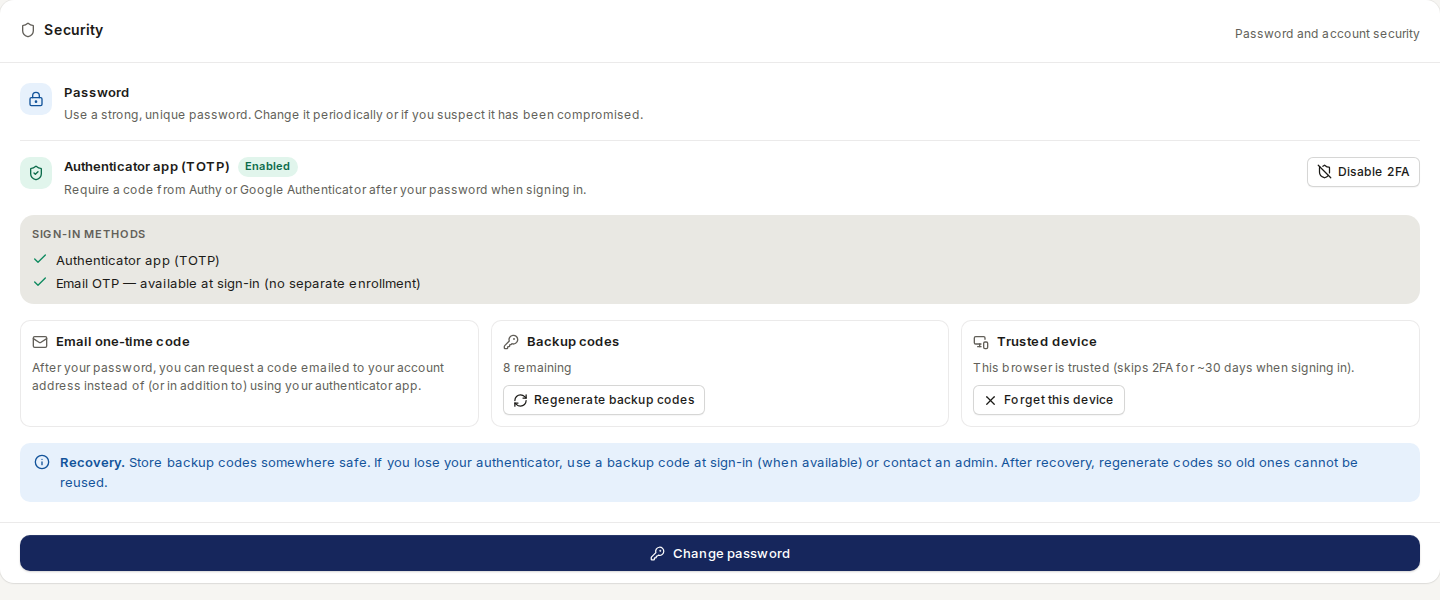
Two-factor authentication (2FA) asks for a code from an authenticator app — Authy, Google Authenticator or any TOTP app — after your password. It is set up in the Security card.
/ade/dashboard/profileTurn it on
- Click “Enable 2FA” in the Security card.
- Enter your Current password and click “Continue”.
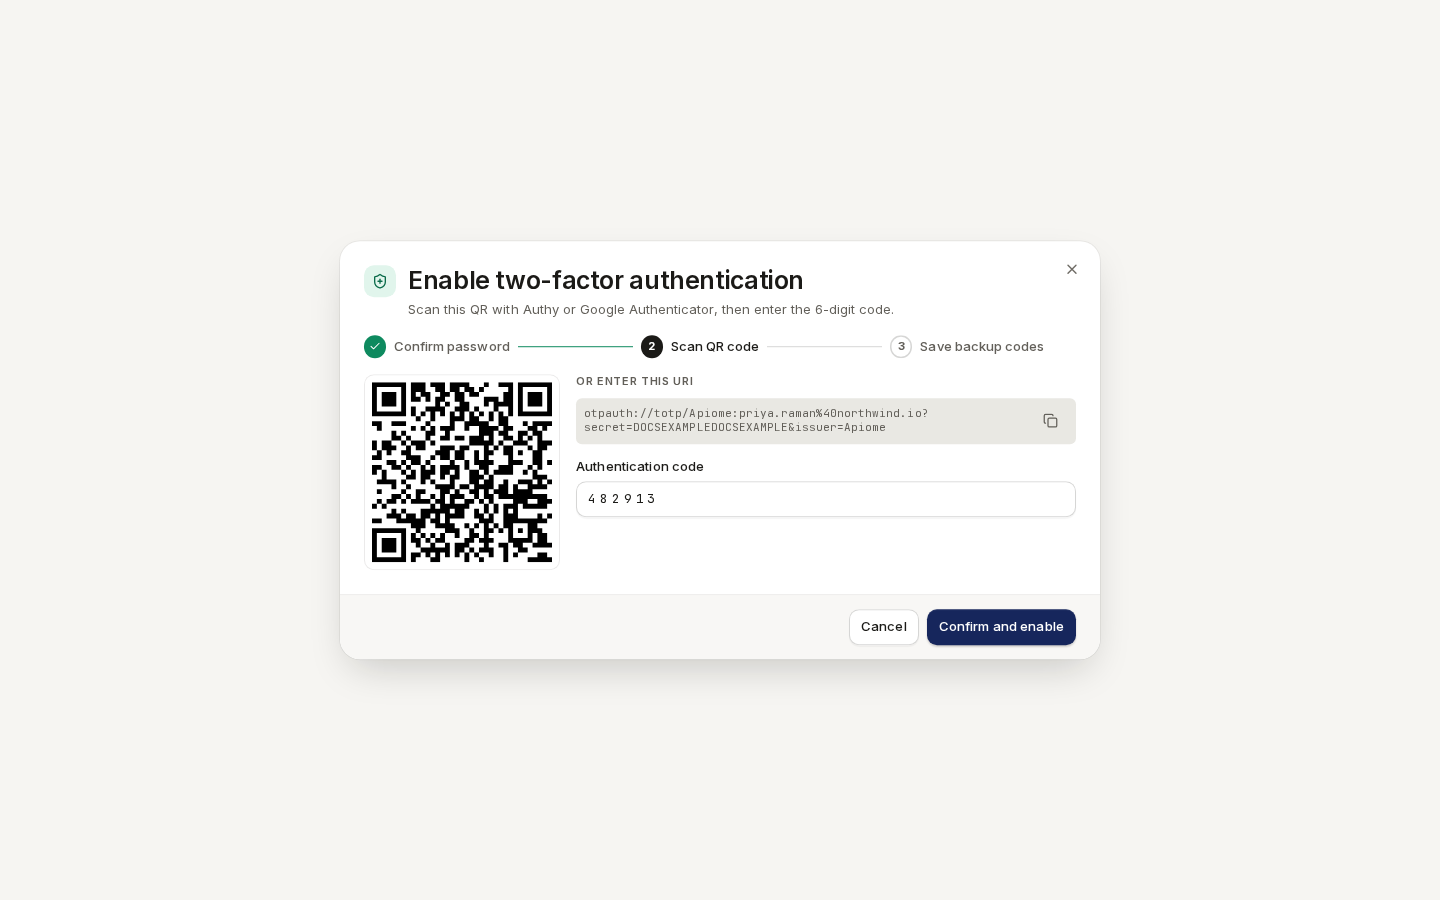
- Scan the QR code with your authenticator app. If you cannot scan it, copy the
otpauth://link under Or enter this URI into the app instead. - Type the six-digit Authentication code the app shows and click “Confirm and enable”.
- Save your backup codes: click “Copy codes” or “Download .txt”, keep them somewhere safe, then click “Done”.
/ade/dashboard/profile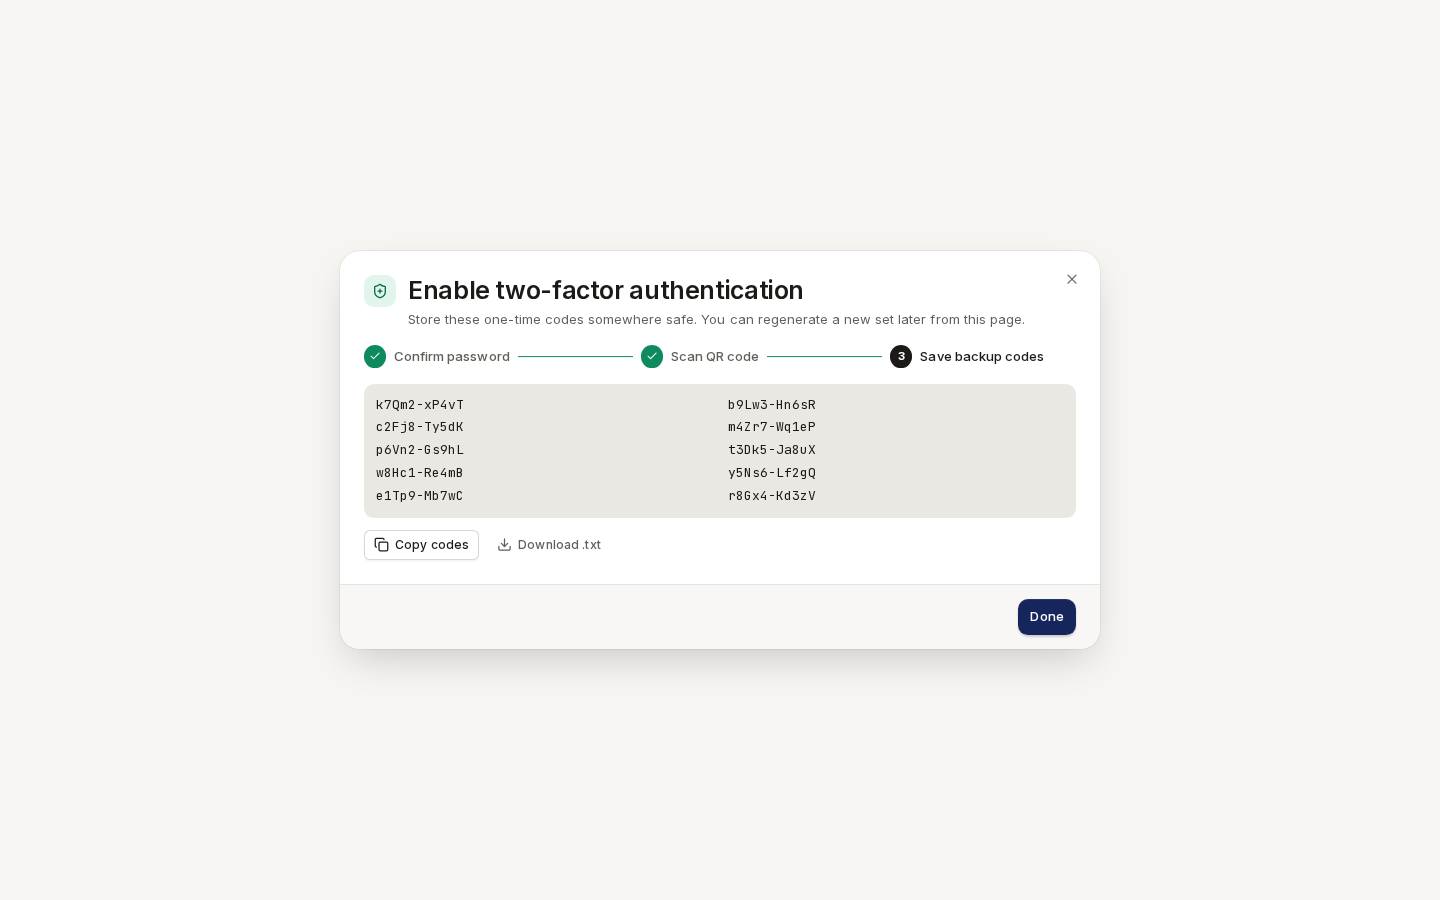
/ade/dashboard/profileThe codes are shown once. Each one signs you in a single time when you do not have your authenticator. The next time you sign in, Apiome asks for a code — see Pass the two-factor check.
Once it is on
The Security card then shows:
- Sign-in methods — Authenticator app (TOTP), and Email OTP when your deployment can send email. An emailed code needs no set-up: you can ask for one at sign-in instead of using the app.
- Backup codes — how many are left (8 remaining).
- Trusted device — whether this browser is trusted, which skips 2FA when you sign in here for about 30 days. Click “Forget this device” to be asked for a code in this browser again.
- Recovery — if you lose your authenticator, use a backup code at sign-in or ask an admin, then make a new set of codes.
Make new backup codes
- Click “Regenerate backup codes”.
- Enter your Current password and click “Regenerate”. Your old codes stop working at once.
- Copy or download the new codes and click “Done”.
Turn it off
- Click “Disable 2FA”.
- Enter your Current password and click “Disable 2FA”.
Your backup codes and this browser's trusted-device mark are cleared too. You can turn 2FA on again at any time.
Sign-in methods
The Sign-in methods card lists every way you can sign in: Password (when you have one) and each linked provider, such as GitHub. Click “Manage linked accounts” to add or remove providers on Linked accounts.
Your session
The Session card shows when your current sign-in expires, how much of its 30 days is left, and the browser and system you are using.
Click “Sign out everywhere” to end every session on every device, including this one; you land on the sign-in page. Use it if you signed in on a shared computer or think someone else has your password.
With the API
Profile, password and two-factor settings are only in the app; there is no REST endpoint or CLI command for them. To call Apiome from scripts, create an API key.