Import wizard
Apiome has two import wizards, and which one you get depends on where you start:
| Wizard | Opens from | Sources | Creates |
|---|---|---|---|
| Import specification | Import on Projects or Versions, Import a spec on Home (I) | File Upload, URL Import, Clipboard Paste, Git Repository, SwaggerHub, Design with AI | A new project |
| Import to catalog | Import to catalog on the Catalog | File, URL, clipboard, Git repository | A catalog item, in its original format |
| Add MCP server | Add MCP server on MCP servers | Every source, with MCP Server selected | A cataloged MCP endpoint |
Postman Collection and MCP Server are offered only in the Add MCP server dialog.
The sample files below are in the Apiome repository under apiome-ui/examples/. Avoid the
negative/ and adversarial/ folders — those files are broken on purpose.
Import specification
Steps: Source → Analyze → Preview → Import → Done.
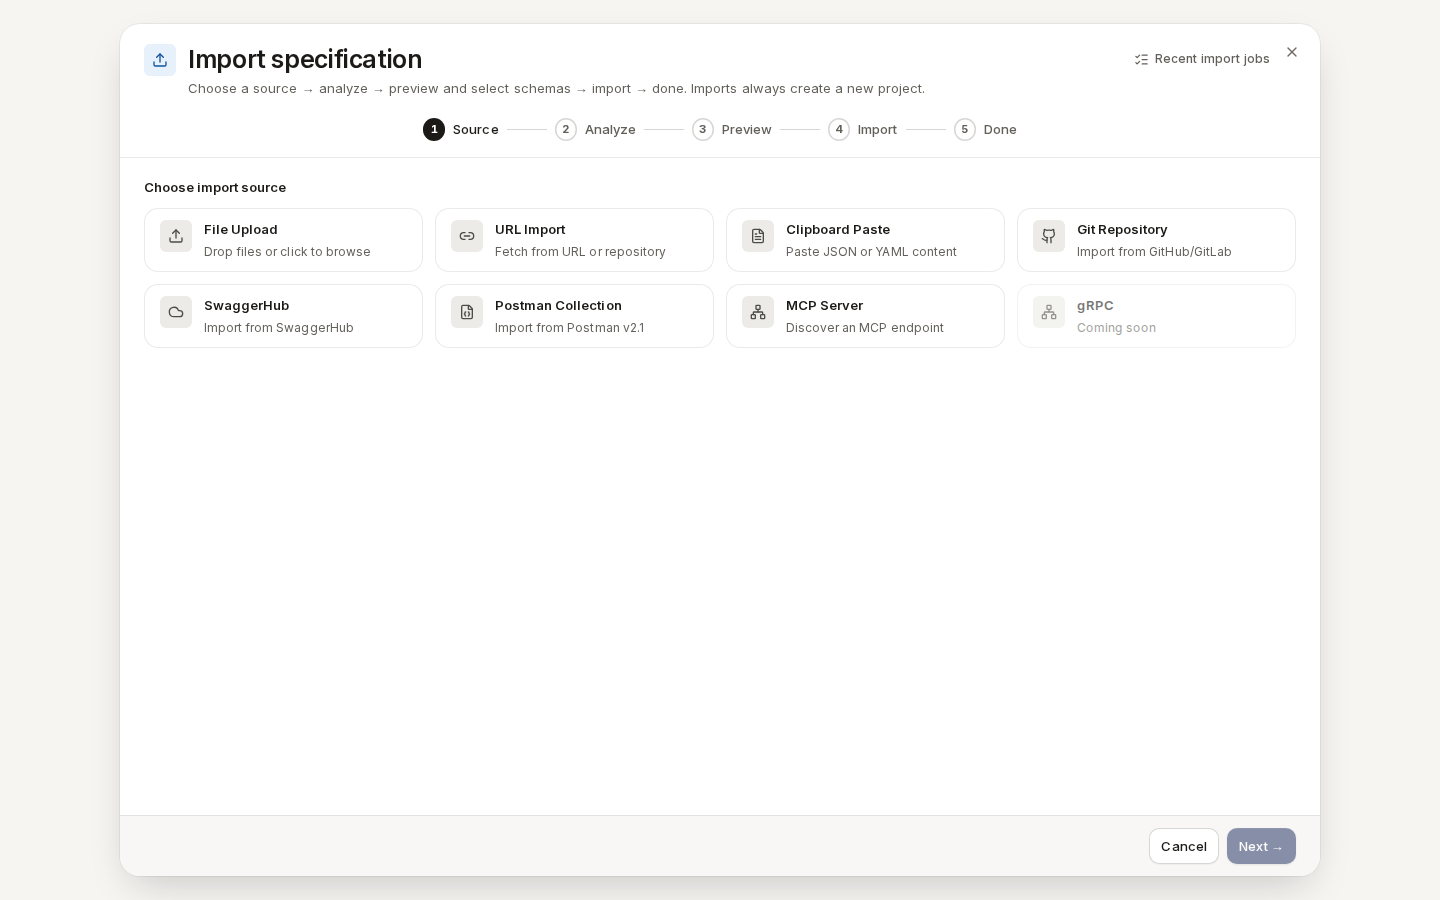
/ade/dashboard/catalogAs Add MCP server opens it, with every source. From Projects the wizard offers File Upload, URL Import, Clipboard Paste, Git Repository and SwaggerHub.- Source — choose a card and fill in its intake (below). The forward button is “Analyze →” (“Next →” for a URL).
- Analyze — Apiome detects the format and checks the document. A banner says Ready to import, or what blocks the import (a D/F quality grade, errors, or a format this importer does not take).
- Preview — review the schemas in a List View, Relationship Diagram or Tree View, pick them with Select All / Select None and the filters, and set the Project Name, Slug and Version under Import Options. Click “Import →”.
- Import — the job runs; you can close the dialog and it keeps going.
- Done — Import Complete! “Undo import” reverses it; “Download error report” explains anything that was skipped.
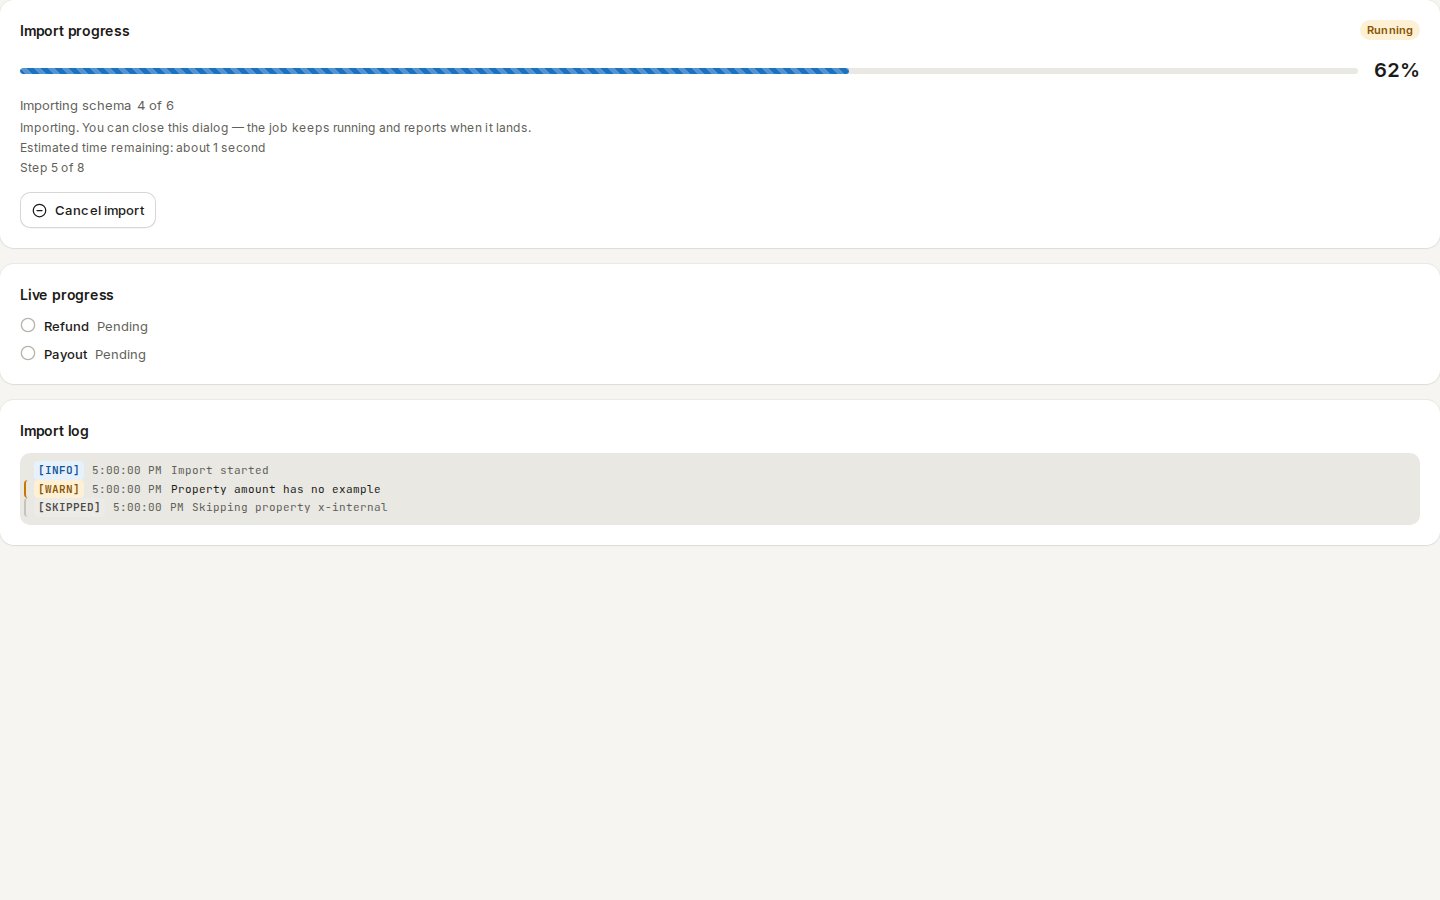
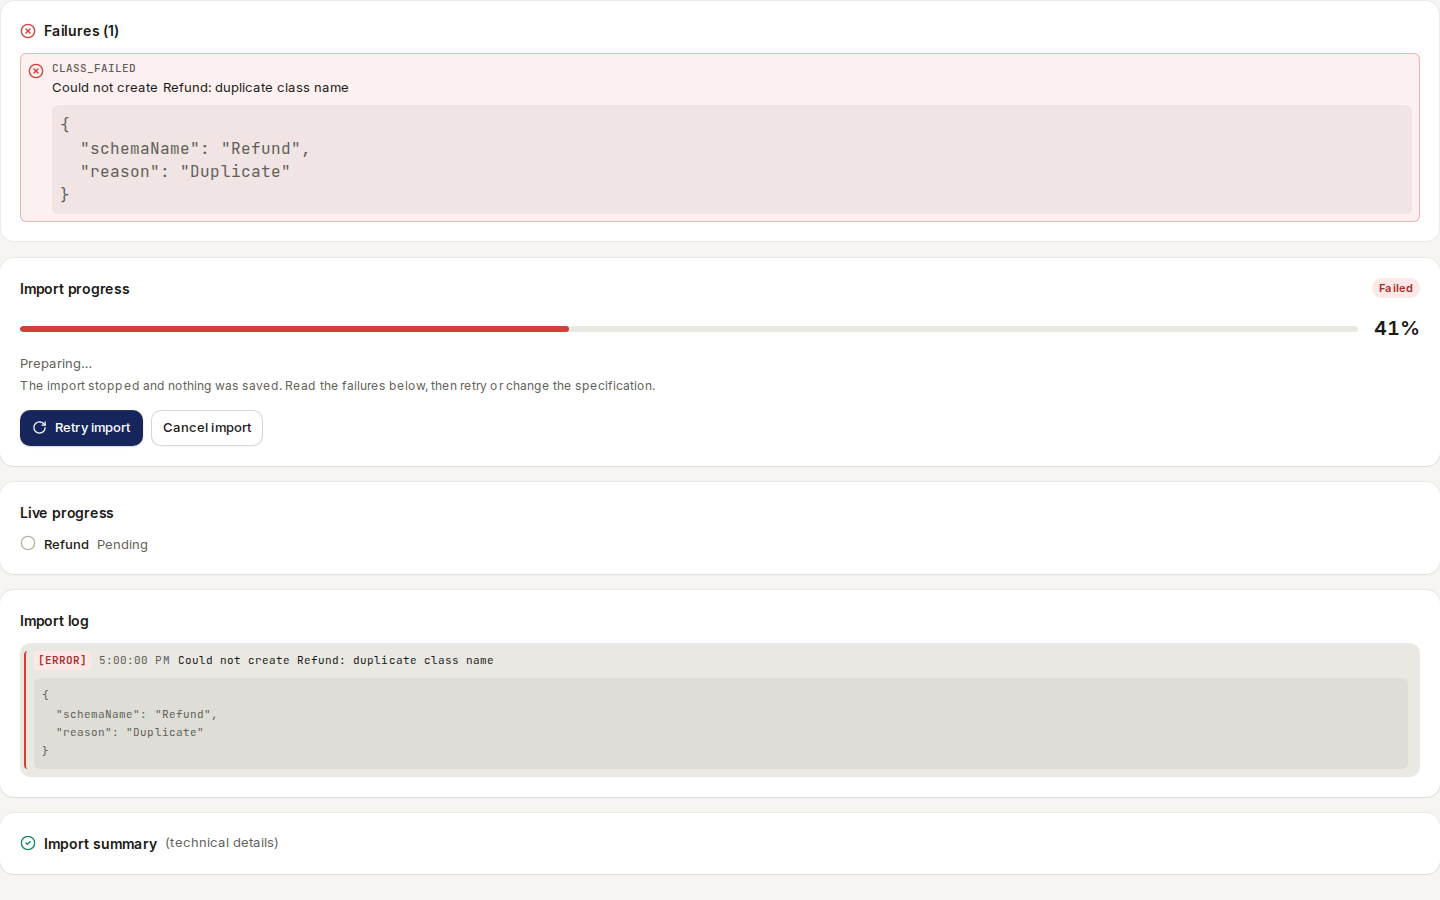
/ade/dashboard/catalogIf the import fails, nothing is saved; the failures are listed with “Retry import”.
/ade/dashboard/catalogRecent import jobs in the wizard's header lists earlier jobs.
File Upload
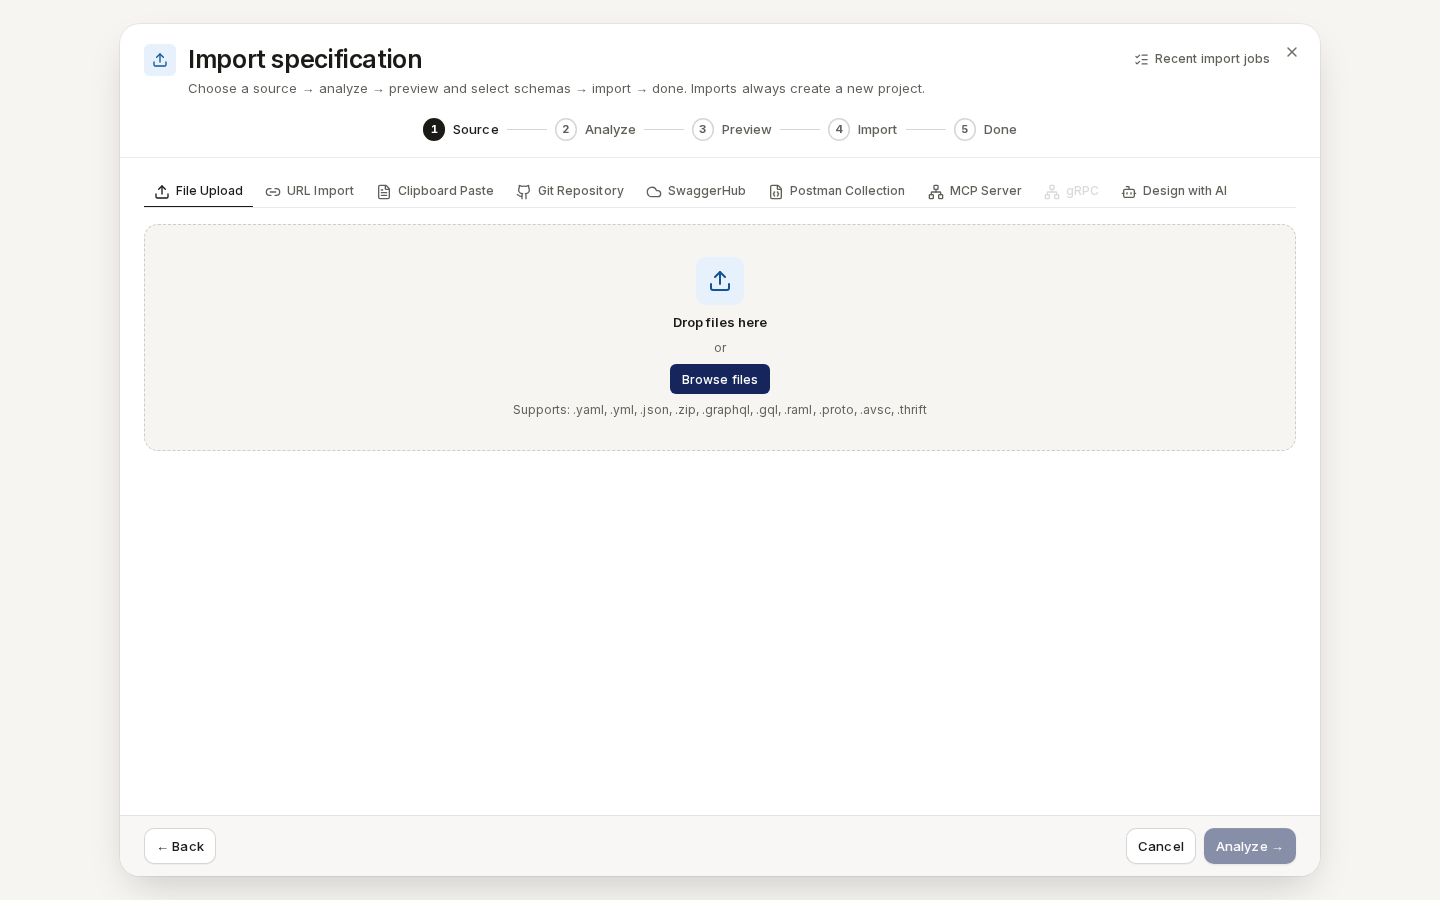
/ade/dashboard/catalog- Click “File Upload”, then drop a file on Drop files here or click “Browse files”. Supports lists the extensions Apiome reads.
- Try
apiome-ui/examples/openapi/30-openapi-3.0-petstore.yaml, then click “Analyze →”.
URL Import
- Click “URL Import” and enter the Specification URL — for example
https://raw.githubusercontent.com/apiome/apiome/main/apiome-ui/examples/openapi/30-openapi-3.0-petstore.yaml. - For a protected URL, choose Authentication: Bearer Token, API Key (with its Header
Name, such as
X-API-Key) or Basic Auth. - Click “Test URL”; when it says URL tested ✓, click “Next →”.
Only http and https URLs work. The fetch runs in your browser, so the server must allow it
(CORS) — if it does not, download the file and use File Upload.
Clipboard Paste
- Click “Clipboard Paste”, then “Paste from Clipboard” — or paste into Specification Content.
- Try the contents of
apiome-ui/examples/swagger/01-swagger-2-petstore.yaml, then click “Analyze →”.
Git Repository
You need a linked GitHub or GitLab account first — “Go to Linked accounts” takes you there.
- Click “Git Repository” and enter the Repository URL (
https://github.com/org/repoororg/repo), then click “Load repository”. - Choose a Branch or Tag and the Spec path — for example
specs/openapi.yaml. - Click “Open file”, then “Analyze →”.
To import many files from one repository, register it under Repositories instead.
SwaggerHub
- Click “SwaggerHub” and enter the Owner / Organization and API Name as they appear in
the SwaggerHub URL — for
app.swaggerhub.com/apis/myorg/petstore,myorgandpetstore. - Keep Use latest version, or pick Specific Version. A private API needs an API Key.
- Click “Test & Fetch”, then continue.
Design with AI
Design with AI drafts a specification from a description; “Import This Spec” loads the draft into the wizard as if you had pasted it. It is also on New project → Design with AI.
Postman Collection
In Add MCP server, click “Postman Collection”, choose a collection file (.json) — try
apiome-ui/examples/postman/01-tasks-collection.postman_collection.json — or paste its JSON, and
click “Convert to OpenAPI & Continue”. Apiome converts it to OpenAPI 3.1 (Converted to OpenAPI
3.1) and carries on as a file import.
MCP Server
See Add an MCP server.
Import to catalog
Click “Import to catalog” on the Catalog. Steps: Source → Detect & route → Options → Quality → Import.
- Source — File (drop a source file), URL (Document URL, then “Fetch and
detect”), paste (Source content, then “Detect pasted source”) or Git repository
(Repository URL, Branch, tag, or commit, Path or glob, then “Fetch and detect”).
Try
apiome-ui/examples/graphql/01-simple-user.graphqlorapiome-ui/examples/asyncapi/01-user-events-2.6.yaml. - Detect & route — Apiome names the format it detected (Auto-detected: GraphQL) and where it goes. OpenAPI and Swagger are routed to Projects; choose Import as format if the detection is ambiguous.
- Options — for JSON Schema, choose to keep it in the catalog for later conversion or to use it as types. Skip the quality step for clean imports saves a step.
- Quality — a pre-flight lint. “Import” when it is clean, or “Import anyway”.
- Import — the item is stored in its original format. Use Convert to OpenAPI when you are ready.
With the CLI or the API
- CLI:
apiome import auto ./30-openapi-3.0-petstore.yaml,apiome import graphql ./01-simple-user.graphql,apiome import preflight— see the CLI quick-start. - REST:
POST /v1/tenants/{tenant}/imports(and…/imports/upload),GET …/imports/{job},POST …/imports/{job}/commit|rollback,POST /v1/import/detect— see Import a specification and the API reference.