Users
/admin/dashboard/users
Users holds every account on the installation, across all workspaces, and the queue of people who have signed up and are waiting for an account. Sign in to the admin console and choose Users in the sidebar.
This is the installation-wide account list. To manage who belongs to one workspace and with which role, use Members & seats in the app, or Tenants here.
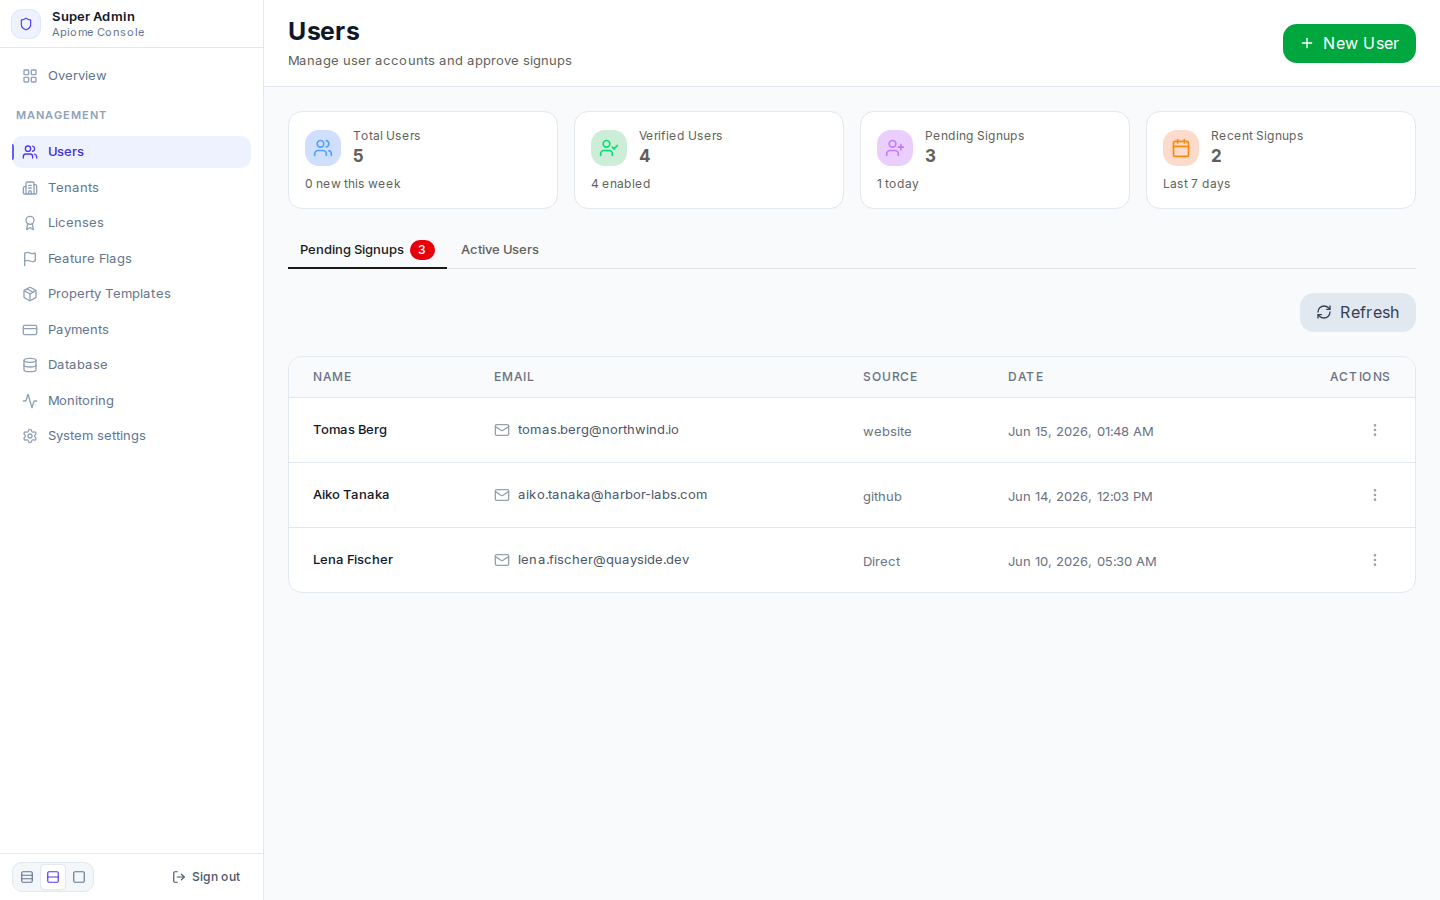
/admin/dashboard/usersThe four cards at the top are live:
| Card | Shows | Underneath |
|---|---|---|
| Total Users | Every account | How many were created in the last 7 days |
| Verified Users | Accounts with a verified email | How many are enabled |
| Pending Signups | Requests in the queue | How many arrived today |
| Recent Signups | Requests from the last 7 days | Last 7 days |
Refresh reloads the cards and both tabs. The result of every action shows in a banner above the cards for five seconds.
Approve a signup
The page opens on Pending Signups, whose tab carries the queue's count. Each row shows the person's Name, Email, Source (Direct when the signup did not record one) and Date.
- Click the ⋮ button at the end of the row.
- Click “Create User”.
- Click “Create account” in Create an account for <name>?
The person gets a verified, enabled account with the password they chose when they signed up, can sign in straight away, and leaves the queue. If an account with that email already exists, the banner reads User with this email already exists and nothing changes.
To turn a request down instead, click “Delete Signup” and confirm with “Delete request”. The request leaves the queue; nobody is emailed, and the address can sign up again.
Find and manage an account
Click “Active Users” for every account, with its License, Status and Created date. Status shows two badges: Verified or Unverified, and Enabled or Disabled.
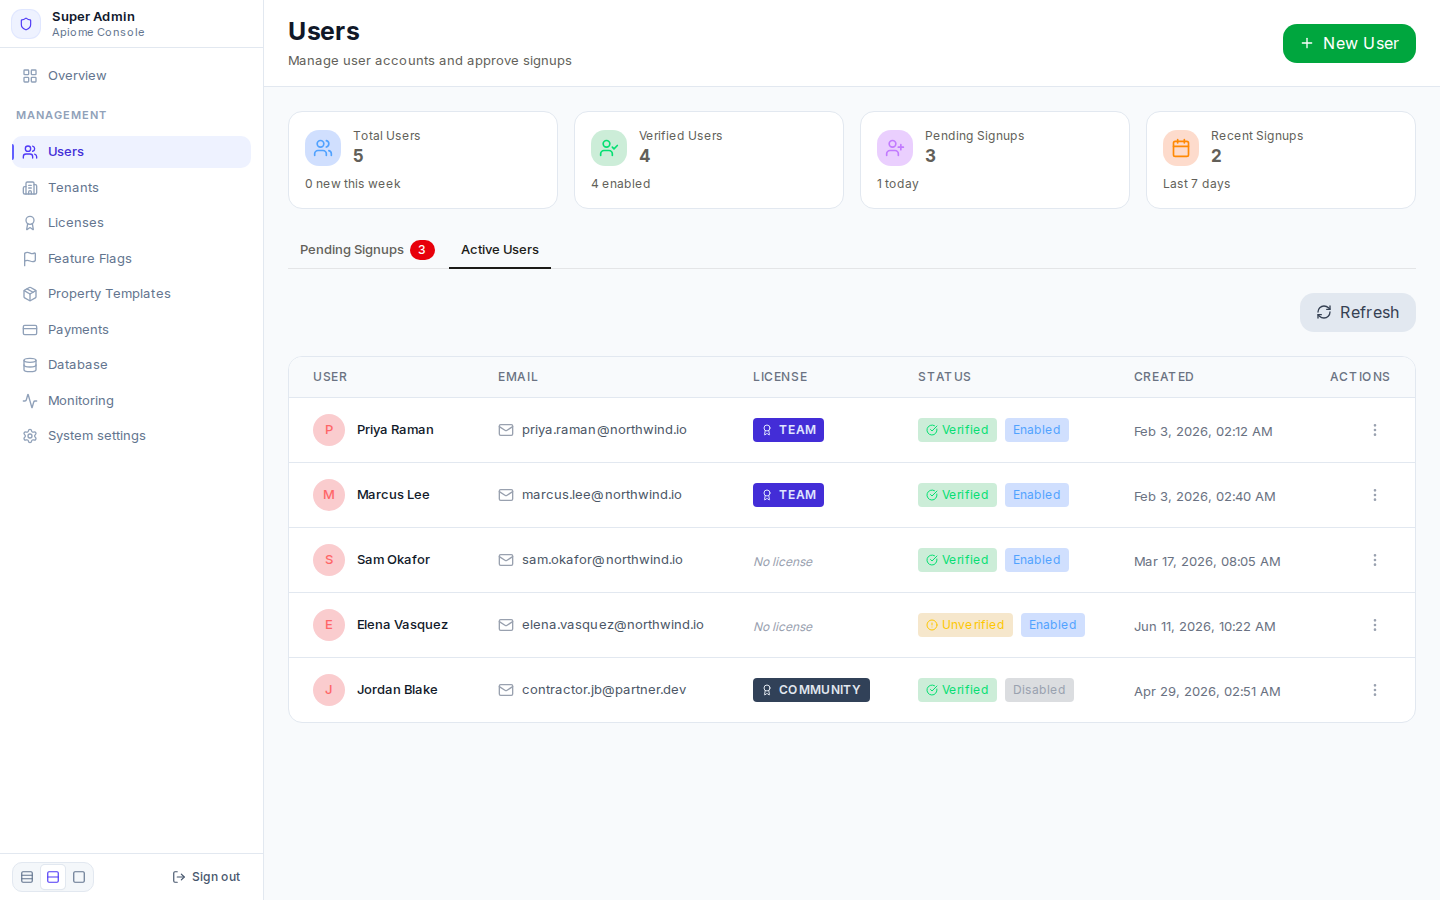
/admin/dashboard/usersClick the ⋮ button on a row for its actions:
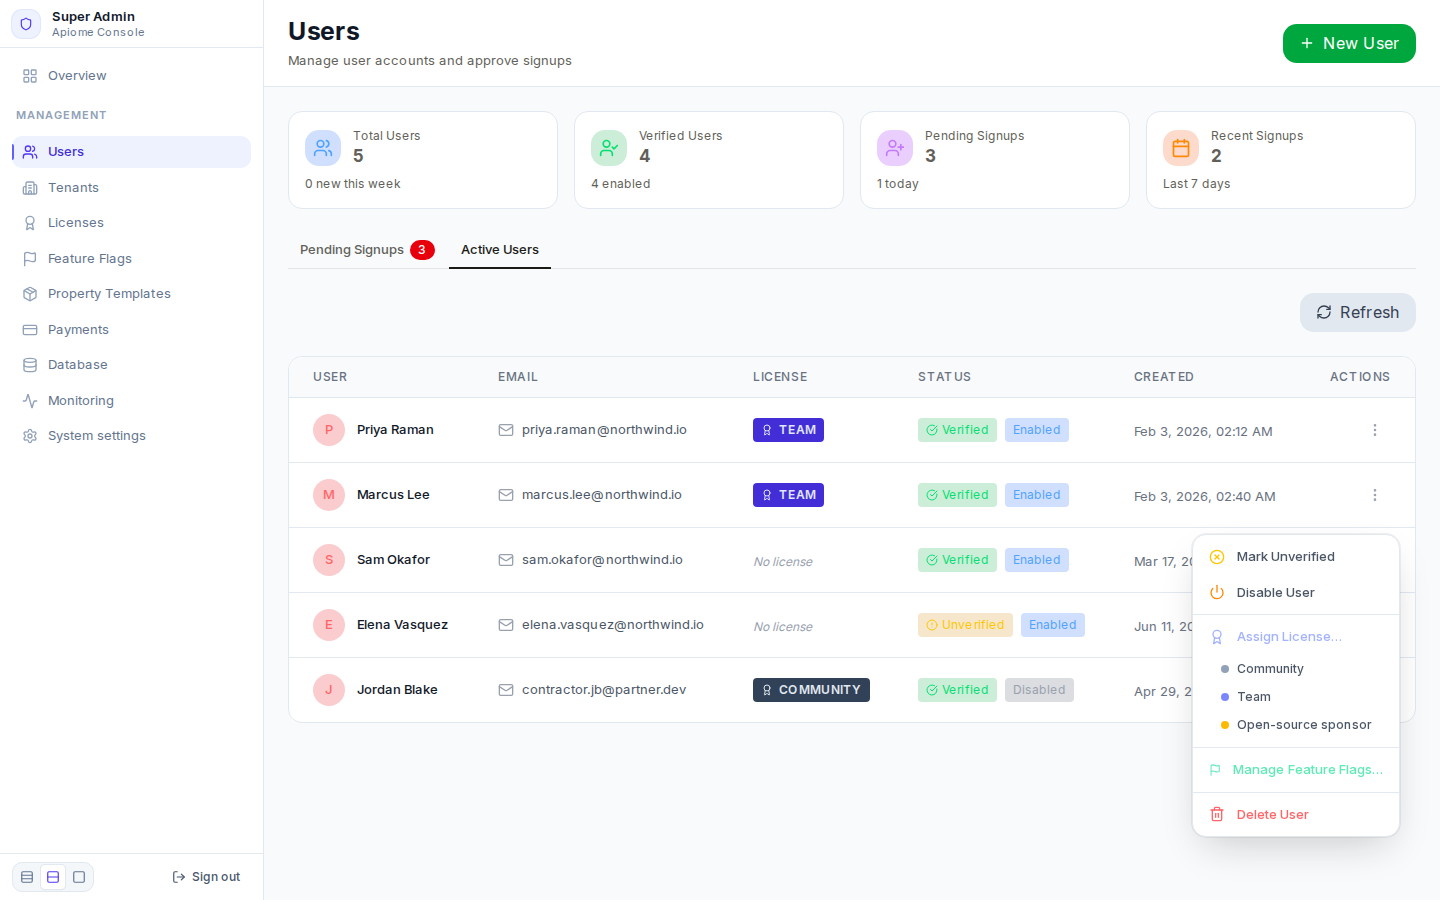
/admin/dashboard/users| Action | Effect |
|---|---|
| Mark Verified / Mark Unverified | Sets whether the email counts as verified. An unverified account cannot sign in. |
| Disable User / Enable User | A disabled account cannot sign in. Nothing is deleted. |
| Assign License… | Opens the list of enabled licenses; click one to assign it, replacing any license the user had. Remove License appears when the user has one. See Licenses. |
| Manage Feature Flags… | Opens Feature Flags for this user — the flags their license grants, and per-user overrides. Click “Done” to close it. See Feature flags. |
| Delete User | Deletes the account — see below. |
Create an account
To add someone who has not signed up:
- Click “New User” at the top right.
- Fill in Name, Email and Password (at least 8 characters; it is stored as a bcrypt hash). Give the person this temporary password by a channel you trust.
- Leave Mark email as verified and Enable account immediately ticked so they can sign in at once, or untick either to hold the account back.
- Click “Create User”.
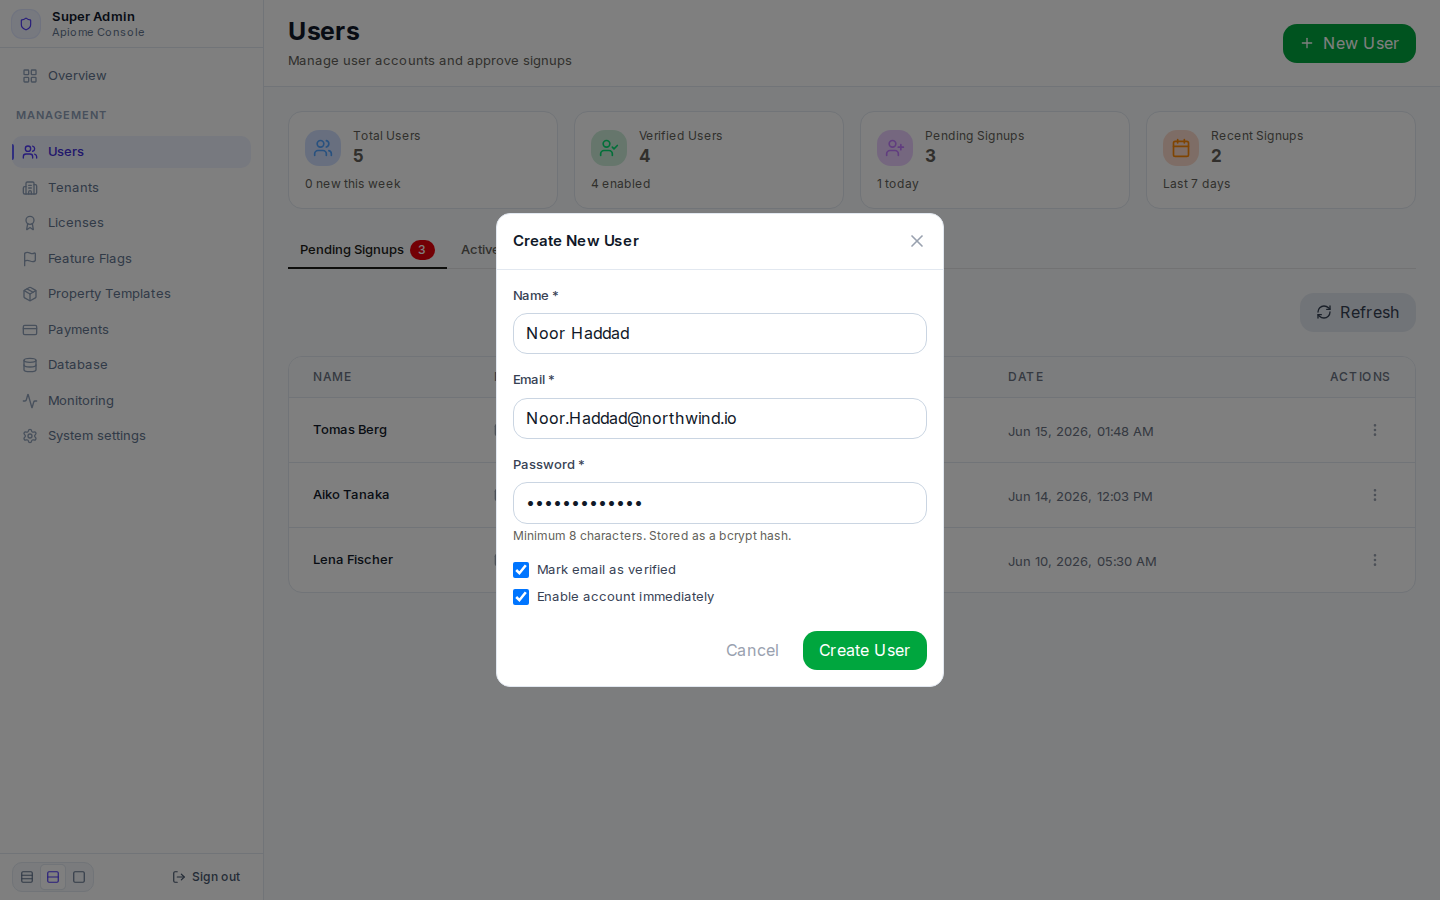
/admin/dashboard/usersThe email is stored in lower case. The page switches to Active Users, where the new account appears.
Delete an account
- Click the ⋮ button on the row, then “Delete User”.
- Type the user's email in the confirmation field. Delete user stays off until it matches.
- Click “Delete user”.
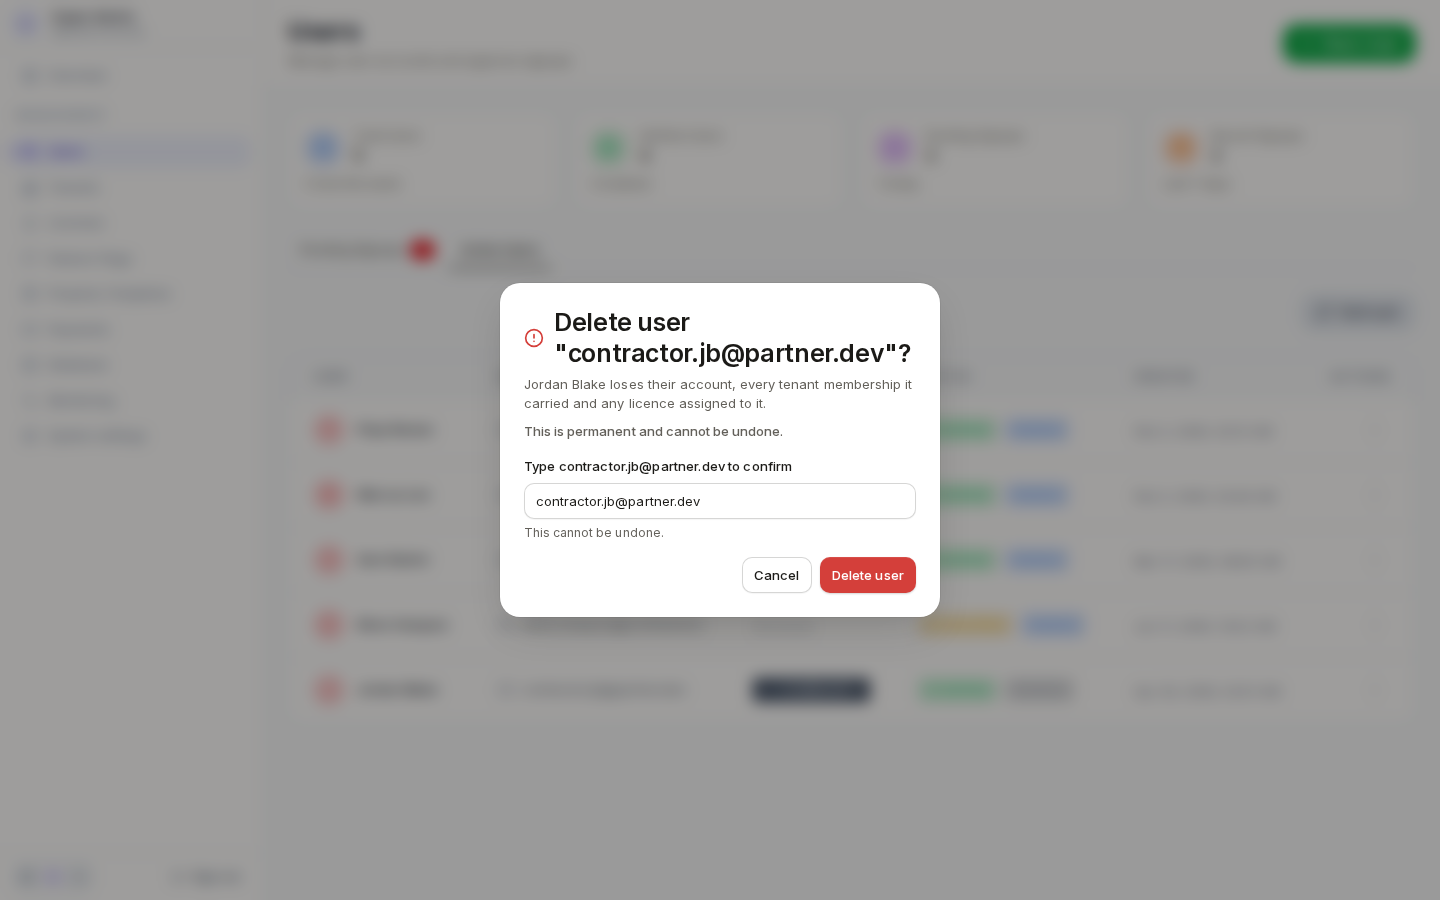
/admin/dashboard/usersThe account, every tenant membership it carried and any license assigned to it are gone; this cannot be undone. To stop someone signing in but keep their account, disable it instead.
With the API
There is no REST endpoint or CLI command for these screens: apiome-ui reads and writes the
apiome.users and apiome.signup tables through its own server. Inside one workspace, membership and
roles are managed from Members & seats instead.