Migrations
/ade/migration
When a new version changes a class schema — a property renamed, a value set changed, a field added — the records stored against the old version no longer fit. Migrations is where you plan how they move: for each class, a migration plan of rules that turn a record shaped by the from version into one shaped by the to version, and a preview of what each record becomes.
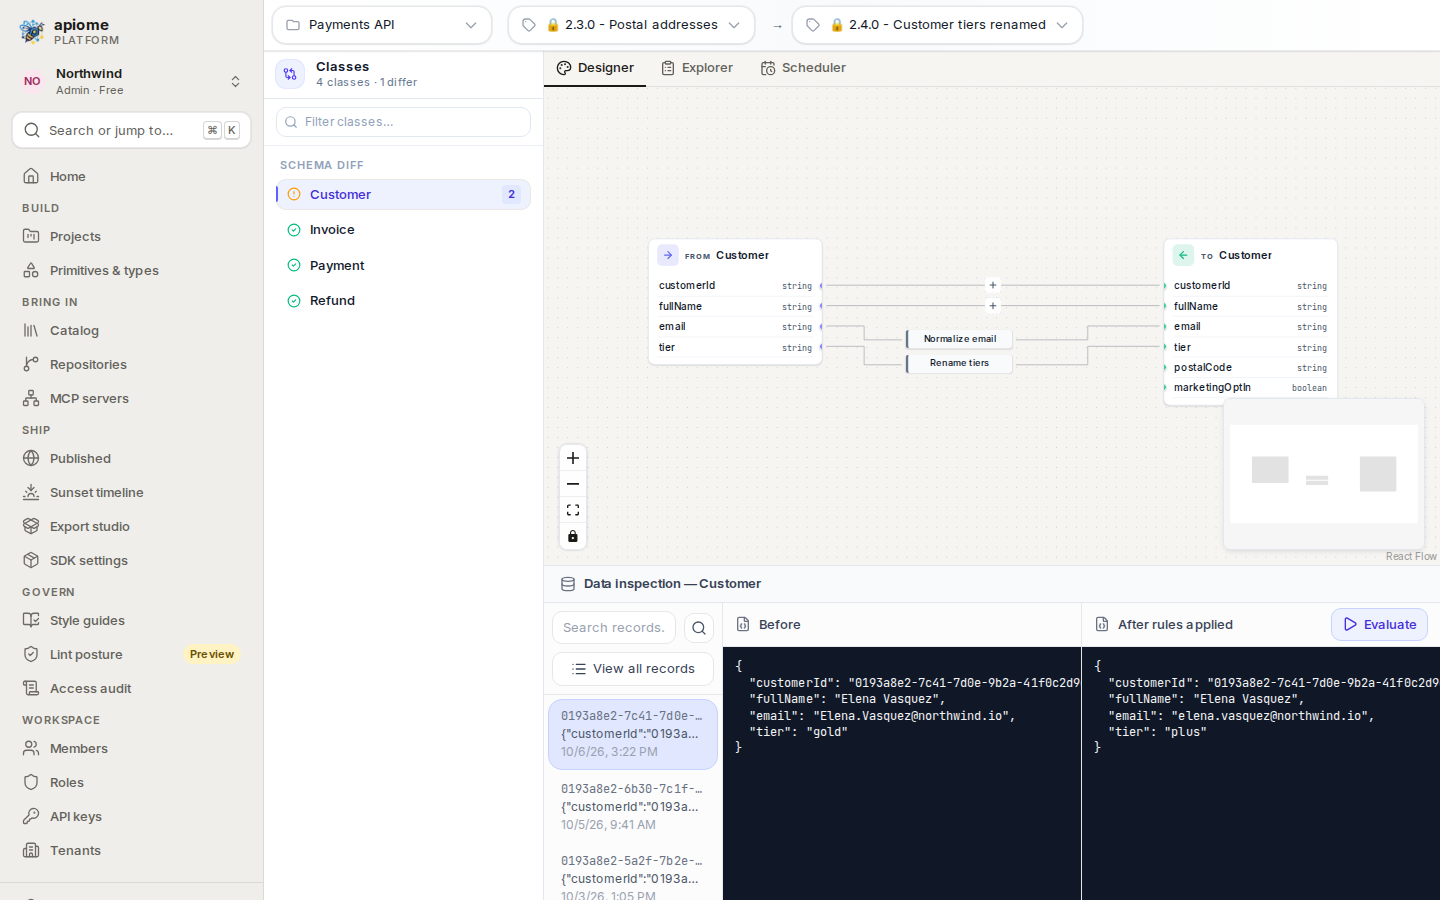
/ade/migrationOpen /ade/migration in the app. Like the Data browser, it is a Tools
surface with no item in the navigation rail or the command palette.
Migrations plans and previews; it does not change stored records. Scheduler — where running a plan will live — reads Scheduling tools and workflows will be available here.
Choose what to migrate
- Choose a project from Select project... in the toolbar.
- Choose the version to migrate from in the first Select version..., and the version to migrate to in the second. They must differ; choosing the same one twice asks you to Choose Different Versions.
- Click a class under Schema diff in the Classes sidebar.
The sidebar lists every class in either version; its heading counts them (4 classes · 1 differ). Each class is marked Schema differs between versions or Schemas match, and the number beside it is how many rules its plan has. Type in Filter classes… to narrow the list.
Design the plan
The Designer tab draws the class in both versions: From on the left, To on the right, one row per property.
- A line with a + joins a property both versions have. With no rule on it, the value is copied as it is (a passthrough).
- A rule sits on the line between them, labelled with its name. Click it to change it.
To add a rule:
-
Click the + on the line of the property it starts from.
-
Optionally choose a Rule template — Pass through, Split string, Concatenate, Default value, Trim whitespace, Lowercase, Uppercase and others — or keep Custom (no template).
-
Name the rule (the name appears on the canvas; leave it empty for a passthrough).
-
Pick the Inputs (source properties) and Outputs (destination properties) with Add input and Add output. A rule can read several properties and write several.
-
Choose the Rule type and write the rule:
Rule type Write Example Simple expression A JavaScript expression over the input names; return an array for several outputs String(email).trim().toLowerCase()Script A JavaScript function body that returns the value (or array of values)const [first, ...rest] = fullName.split(" "); return [first, rest.join(" ")];SparkSQL A SparkSQL expression, for when the plan runs in Spark — -
Under Test rule, type sample values for the inputs and click “Run”; the outputs appear on the right. SparkSQL rules cannot be tested in the browser.
-
Click “Save rule”.
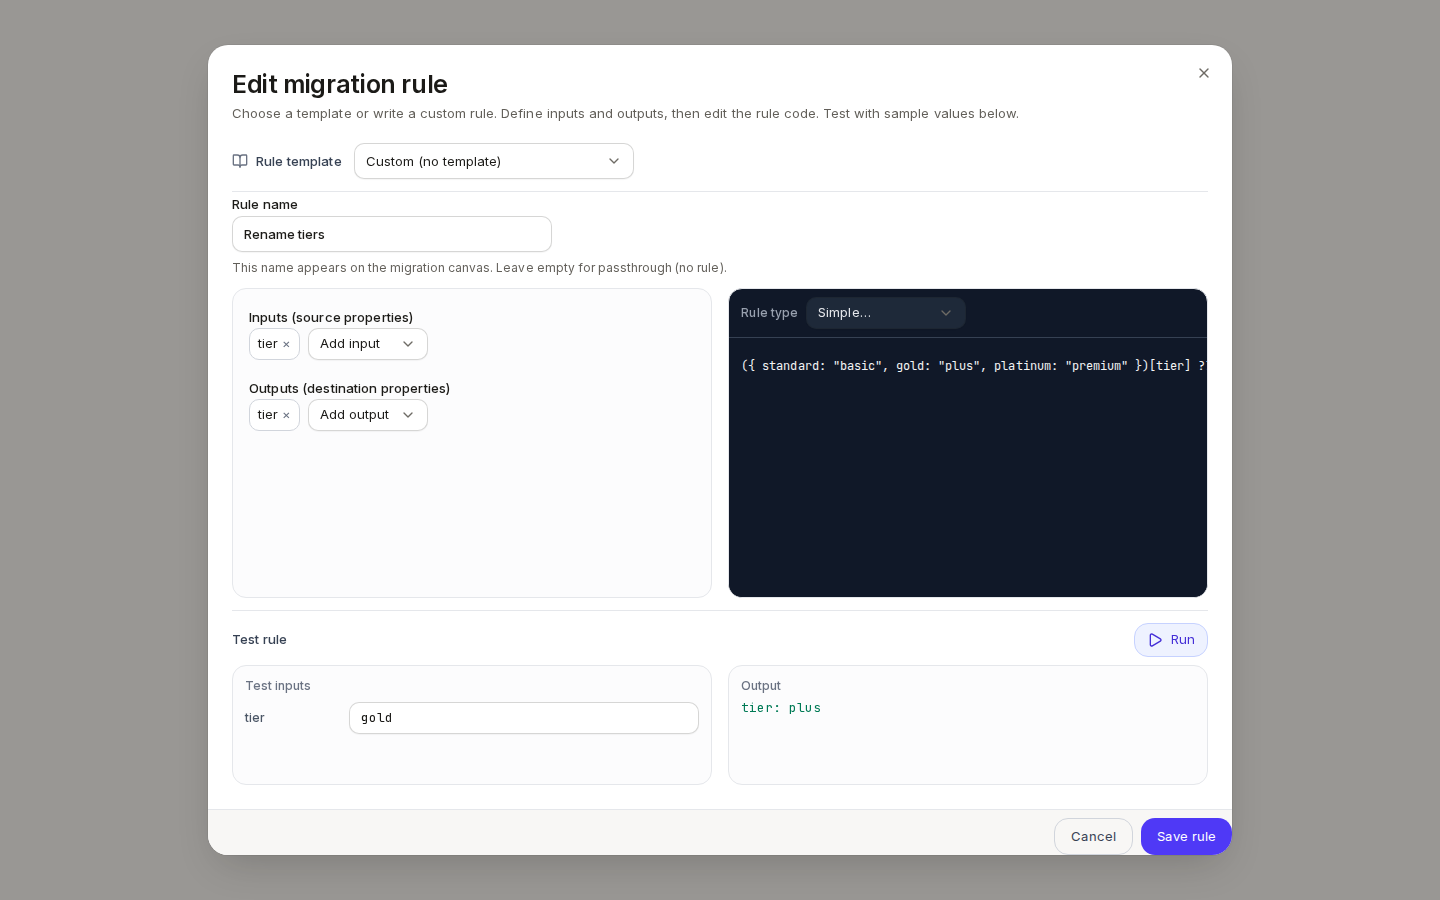
/ade/migrationA rule starts from a property both versions have. A property that exists only in the from version has no line of its own, but it can still be an input to a rule started on another line; a property only in the to version gets a value only when a rule outputs to it.
Saving a rule saves the class's plan to the workspace, for every member to see.
Preview records
Below the canvas, Data inspection lists the class's records from the from version. Click “View all records” (or search with Search records...), pick a record, and click “Evaluate”: Before shows the record as stored, After rules applied shows it after the plan.
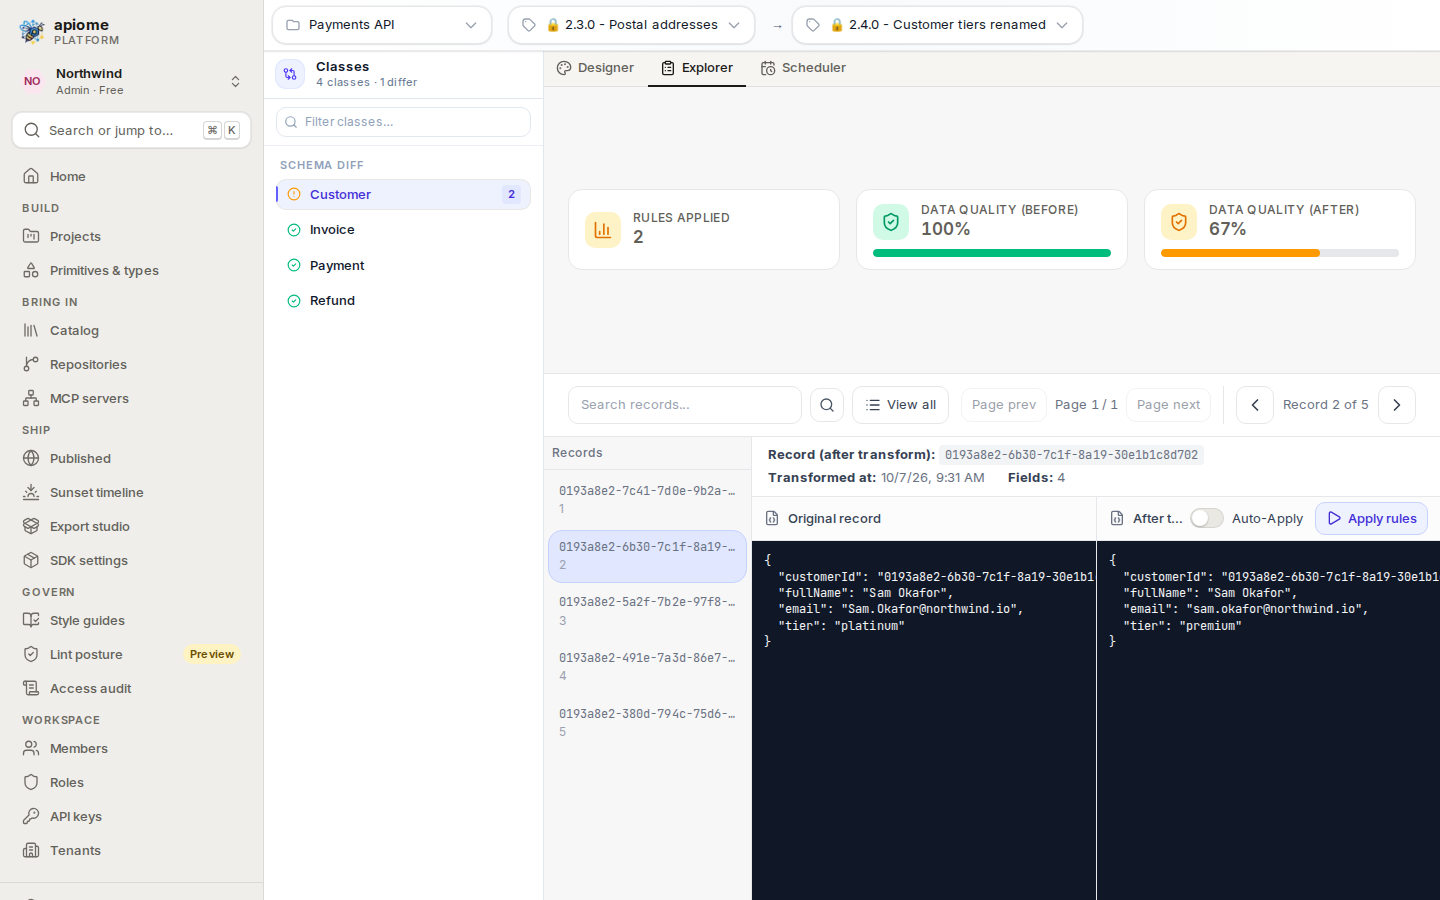
The Explorer tab is the same preview with measures:
- Rules applied — how many rules in the plan have content.
- Data quality (before) and (after) — how many of the schema's properties the record fills, against the from and then the to schema. An after score below 100% means some properties of the new version are left empty — add rules that fill them.
Click “View all”, pick a record (or step with the arrows beside Record 2 of 5), and click “Apply rules” — or turn on Auto-Apply to apply them to each record you pick.
/ade/migrationWho can do what
Any member can open Migrations and preview plans. Saving a rule needs versions:edit — see
Roles & permissions.
With the API
Plans are stored per project, version pair and class — see the API reference:
GET /v1/migration-plans/{tenant_slug}— a class's rules (projectId,fromVersionId,toVersionId,className)PUT /v1/migration-plans/{tenant_slug}— save themGET /v1/migration-plans/{tenant_slug}/counts— rules per class for a version pair
There is no CLI command for migration plans.
Where next
- Data browser — the records a plan reads
- Operating Apiome
- Cut a version and Versions