Feature flags
/admin/dashboard/feature-flags
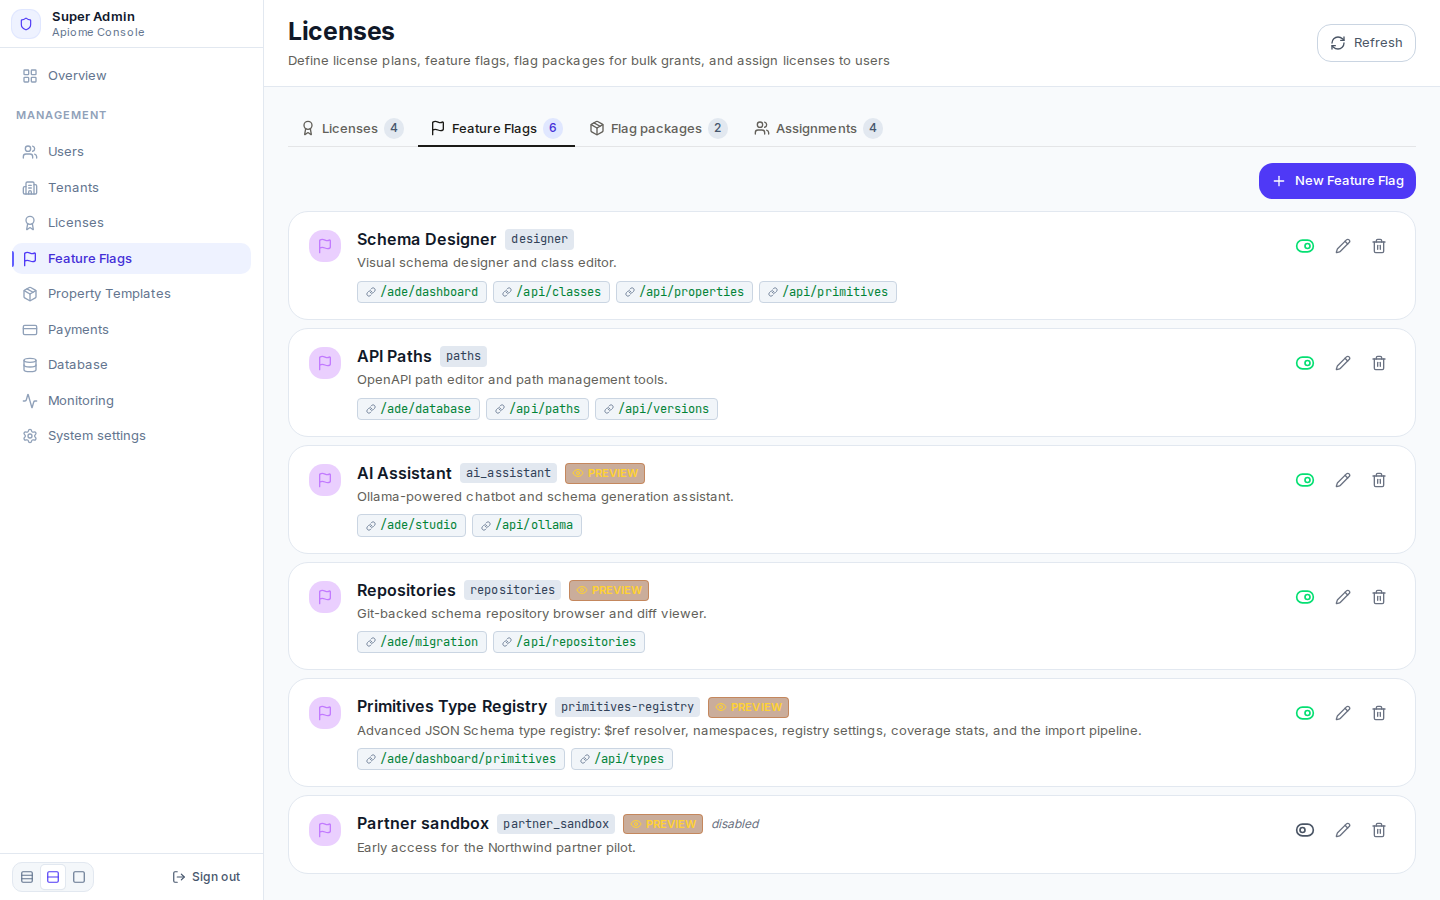
A feature flag names one application or feature — the Schema Designer, the AI Assistant, the type registry — so it can be granted by a license or to a single person. Sign in to the admin console and choose Feature Flags in the sidebar: it opens the Licenses screen on its Feature Flags tab.
/admin/dashboard/feature-flagsWho gets a flag
For a person working in a tenant, Apiome decides each flag in this order and stops at the first answer:
- The flag is switched off (disabled) — off for everyone.
- A per-user grant for that person.
- A per-tenant setting for the tenant.
- Whether the person's license includes the flag.
- Otherwise, off.
The flags a new installation has
| Flag | Machine name | Preview | On the plans |
|---|---|---|---|
| Schema Designer | designer | no | Free, Paid, Sponsor |
| API Paths | paths | no | Paid, Sponsor |
| AI Assistant | ai_assistant | yes | Paid, Sponsor |
| Repositories | repositories | yes | Paid, Sponsor |
| Primitives Type Registry | primitives-registry | yes | Paid, Sponsor |
designer and paths are commercial applications: they decide which apps a person sees on the
home page and in the top navigation. The type registry is only enforced when the REST API runs with
APIOME_PRIMITIVES_REGISTRY_GATING=true; by default every tenant reaches it.
Create or edit a flag
- Click “New Feature Flag” (or a flag's pencil).
- Enter the Machine Name — lowercase letters, numbers and underscores, for example
partner_sandbox. It cannot be changed after creation. - Enter the Display Label, for example Partner sandbox, and a Description.
- Optionally list URL Patterns (one per line) — the paths the flag covers, such as
/ade/studio. Apiome stores them with the flag as a record of what it gates; access is decided by the order above, not by matching these paths. - Switch on Mark as Preview to show a Preview badge wherever the flag is listed.
- Click “Create Flag” (or “Save Changes”).
To grant the new flag, tick it in a plan under Create or edit a plan, or to one person below.
Switch a flag off
Click the toggle on a flag's row (Disable / Enable). A switched-off flag reads disabled and is off for everyone, whatever their license or grants say — the quickest way to withdraw a feature from the whole installation.
The trash icon deletes a flag after you confirm; it is removed from every license and every per-user grant that named it.
Flag packages
A flag package bundles flags you often grant together, so they can be added to a person in one click. Open the Flag packages tab, click “New flag package”, enter a Machine Name and Display Label, tick the Flags in this package, and click “Create Package”.
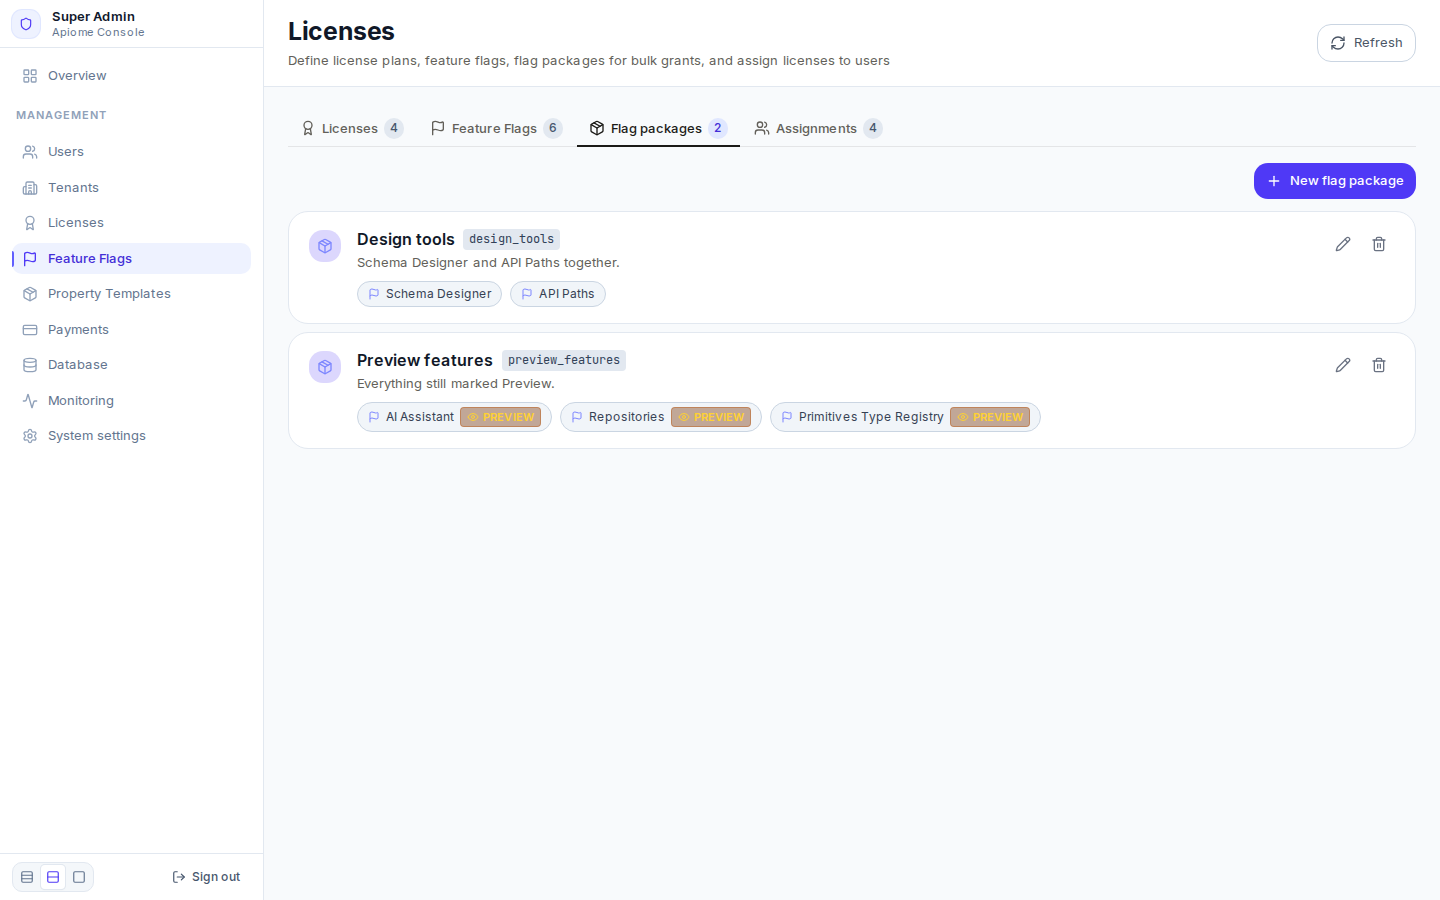
/admin/dashboard/feature-flagsDeleting a package removes only the grouping: its flags stay, and grants already made from it are not changed.
Grant flags to one person
- Open the Assignments tab (on the Licenses screen) and click “Assign” on the person's row.
- Click “Override feature flags…”.
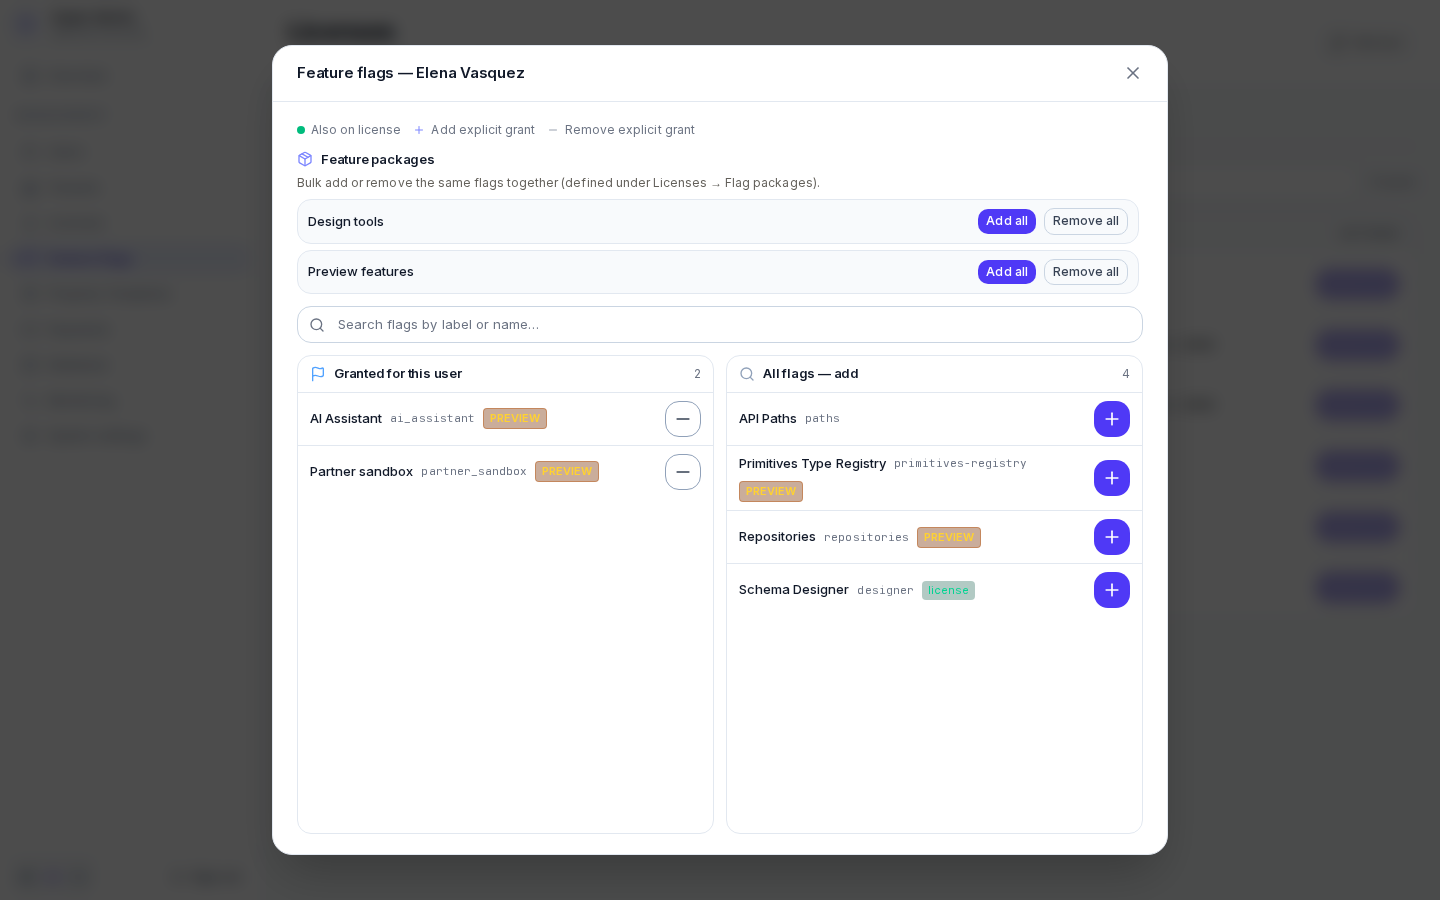
- In Feature flags — name:
- under Feature packages, click “Add all” (or “Remove all”) beside a package;
- or find a flag with Search flags by label or name… and click its + in All flags — add. A green license tag marks a flag the person's plan already includes.
- Flags you granted are listed under Granted for this user; click − to remove a grant. Each change saves at once.
/admin/dashboard/feature-flagsRemoving a grant does not switch the flag off for that person — it hands the decision back to their tenant and license.
With the API
Flags and packages are edited only here. A workspace member sees the features their tenant's plan
turns on in GET /v1/tenants/{tenant_slug}/license — see the
API reference.