Tenants in the admin console
/admin/dashboard/tenants
The admin console's Tenants screen is the operator's view of every tenant (workspace) on the installation — not just the ones you belong to. Create a tenant for someone, rename or disable one, and add or remove its members and administrators. Sign in to the admin console and choose Tenants in the sidebar.
A workspace administrator manages their own workspace from the product instead — see Tenants & the manage drawer.
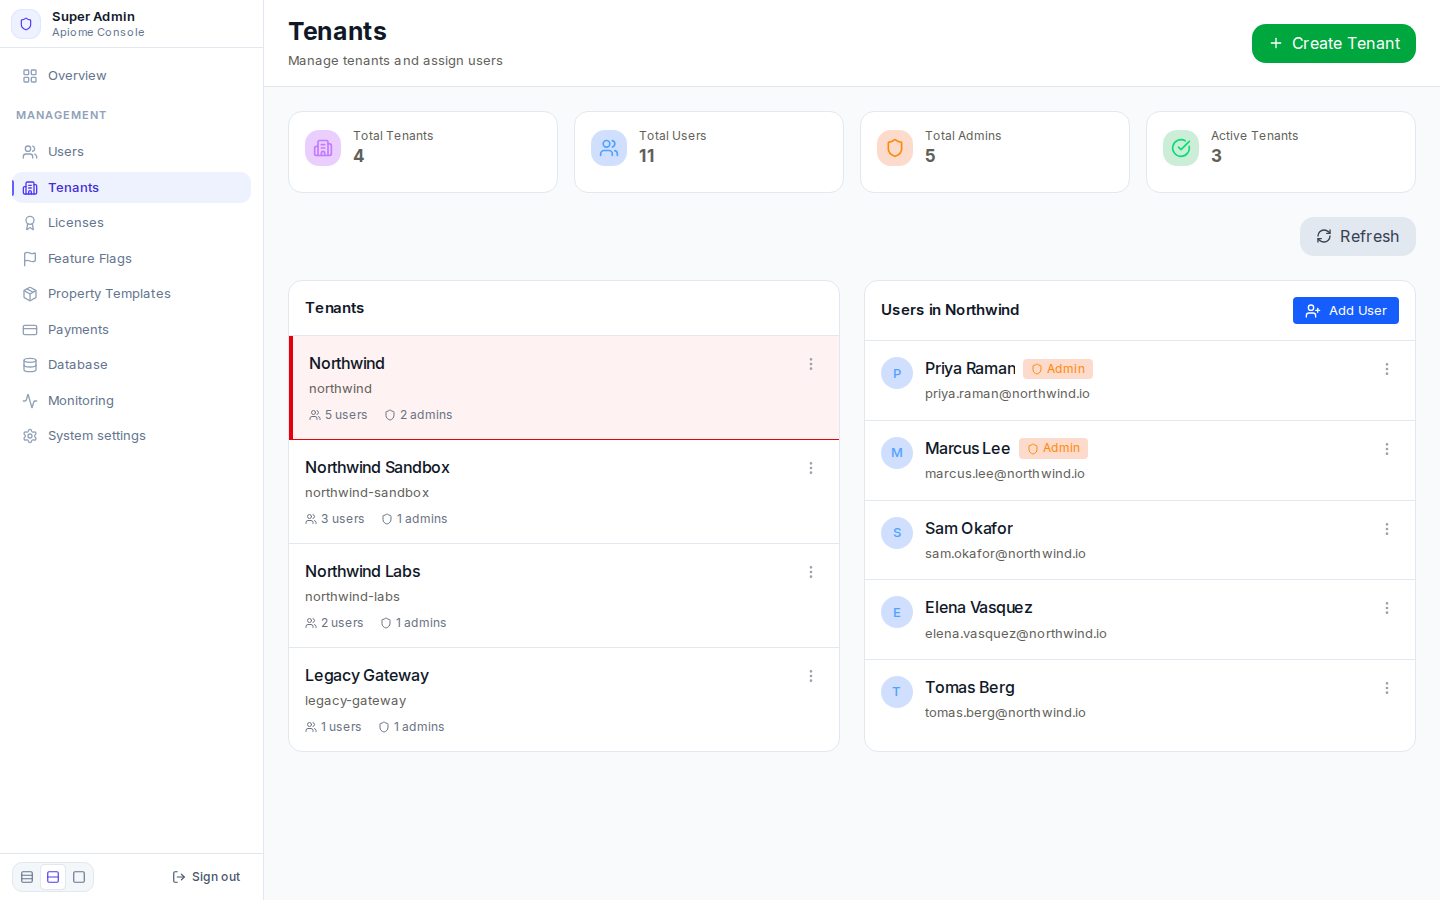
/admin/dashboard/tenantsRead the screen
The four tiles at the top count the installation:
| Tile | Counts |
|---|---|
| Total Tenants | Every tenant |
| Total Users | Memberships, summed across tenants — a person in two tenants counts twice |
| Total Admins | Tenant administrators, summed across tenants |
| Active Tenants | Tenants that are not disabled |
The Tenants list shows each tenant's name, slug and its user and admin counts. Click a tenant to list its members on the right, under Users in tenant; administrators carry an Admin badge. Refresh reloads the list.
Create a tenant
- Click “Create Tenant”.
- Enter the Tenant Name, for example Northwind Payments.
- Check the Slug — lowercase letters, numbers and hyphens only. The field suggests a slug from
the first letter you type and does not follow the rest of the name, so type the slug you want
(for example
northwind-payments). - Optionally add a Description.
- Optionally choose an Initial User (Optional) to add to the tenant straight away, and tick Make this user a tenant administrator to give them admin rights.
- Click “Create Tenant”.
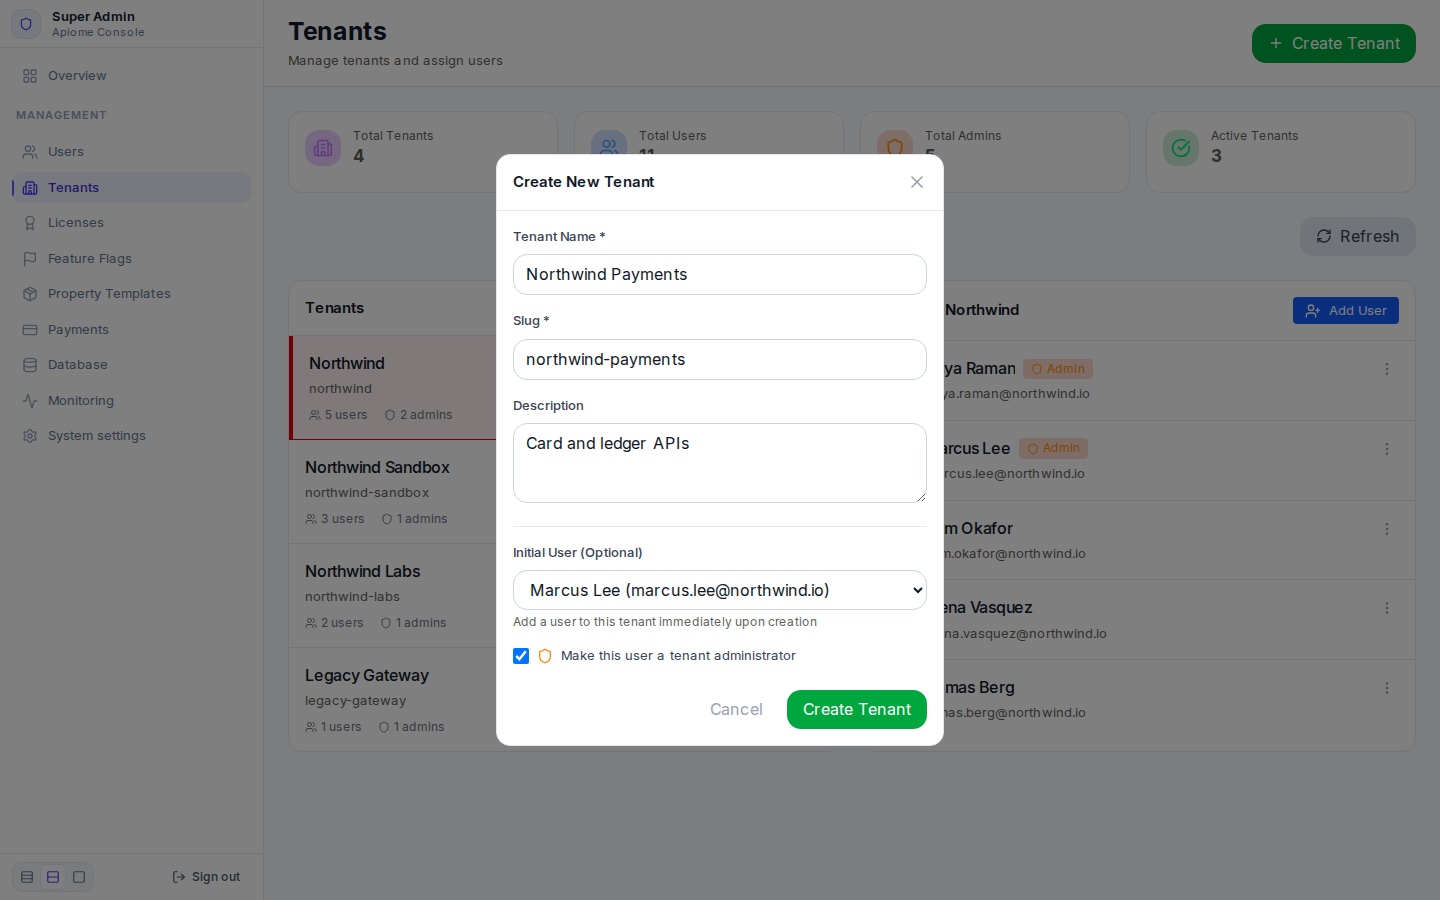
/admin/dashboard/tenantsWhen you choose an initial user, Apiome also seeds the tenant with its sample project so it does not start empty. The banner reads Tenant created successfully with admin user (or with user).
Change a tenant
Open a tenant's ⋮ menu in the list:
| Item | What it does |
|---|---|
| Edit Tenant | Change the name, slug and description, then click “Save Changes” |
| Disable Tenant / Enable Tenant | A disabled tenant is left out of Active Tenants, and its workspace API keys stop authenticating against the REST API until it is enabled again |
| Delete Tenant | Deletes the tenant after you type its name to confirm. Every member loses access, and its projects, versions and API keys go with it |
Manage members
With a tenant selected:
- Click “Add User” and click a person in Add User to Tenant. Only accounts that are not already members are listed.
- Open a member's ⋮ menu for Make Administrator (or Remove Admin Rights) and Remove from Tenant (asks you to confirm).
Adding someone here does not send an invitation and does not check the tenant's seat limit; inviting from the workspace's Members screen does both.
With the API
The admin console reads and writes the database directly through the app's server; there is no REST endpoint or CLI command for these operator actions. Workspace administrators manage their own tenant over REST — see the API reference.
Where next
- Licenses — the plans and seat limits tenants and people run on
- Users — every account on the installation
- Tenants & the manage drawer — the workspace administrator's view
- Operating Apiome